- Home/
- Guides/
- Clock Repair/
- Adjusting a Clock Pendulum
Adjusting a clock pendulum: Tips to correct chimes, beat, and speed
Learn how to fix common pendulum clock issues to keep your timepiece accurate.
Published on
Key Facts
- A clock running too fast usually means the pendulum is set too short, while a slow clock may have a pendulum that’s too long.
- Just one full turn of the pendulum nut can shift the time by several seconds per day.
- It can take 24 hours or more to accurately assess the results of any pendulum adjustment, so patience is key.
Nan may have given you a nice moving-in gift in the form of a gorgeous grandfather clock that fits nicely in your living room. She may have endlessly bragged about the fact that she’s handing down a family heirloom, but you’ve come to discover that it needs a bit of adjustment to tell the correct time.
Adjusting a pendulum clock is quite simple. But before getting your hands dirty, let’s start with the basics.
4 reasons why a pendulum clock is out of sync
 A colourful collection of vintage pendulum clocks displayed on a wall, each with unique designs and ornate cases. (Source: iStock)
Not making it to an appointment on time due to a busted clock is not uncommon. A clock run by a pendulum can be out of sync for a few reasons, such as:
1. Temperature
An increase in temperature causes a thermal expansion, which lengthens the pendulum rod, resulting in changes in the clock’s rate and loss of time.
2. Air or atmospheric resistance
Air density that’s influenced by atmospheric pressure and humidity in and around the area where the pendulum swings can have a subtle but cumulative effect.
3. Leveling
Accuracy is heavily dependent on very precise swings, which means it’s vital to keep the clock absolutely level at all times.
4. Gravity and elevation
Pendulum rate goes up with an increase in gravity; therefore, gravity and elevation can influence the accuracy of pendulum clocks.
If you moved your grandfather clock recently, that can also be a reason.
If your pendulum has stopped swinging, there must be mechanical friction or some sort of resistance that keeps it from moving. But if you’ve noticed that your pendulum clock is out of sync, you’ll have to adjust it.
Don’t worry! You don’t have to be an expert handyman to perform a simple clock repair. As with everything DIY, adjusting a grandfather clock’s pendulum is relatively easy if you know what you’re doing.
Tips on adjusting a clock pendulum
Fixing complicated machinery, such as a grandfather clock, can be challenging for a newbie. But with a handy guide, you’ll be able to learn how to adjust a cuckoo clock pendulum (or any clock that runs using a pendulum) that not only complements your home interior but also tells accurate time.
Adjusting the speed
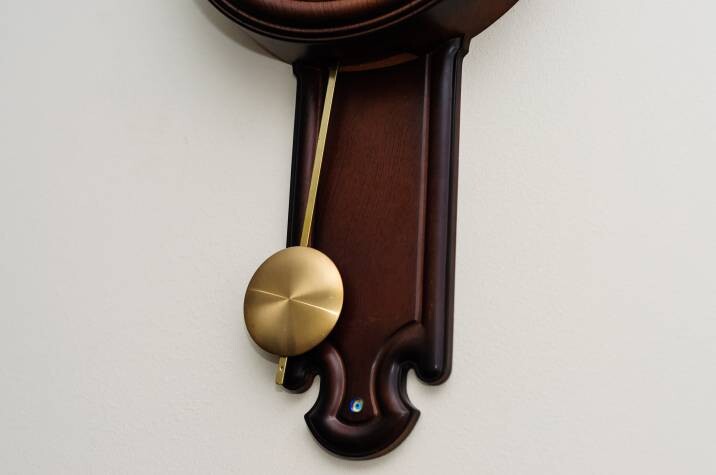 A traditional wall-mounted pendulum clock featuring a brass bob and deep wood finish. (Source: iStock)
To adjust a pendulum clock’s speed, the key is knowing the right length. The longer the pendulum, the slower the clock; the shorter it is, the faster it runs.
The key to adjusting a grandfather clock’s pendulum length is the regulating nut that’s found on the bottom of the pendulum just below the bob. Turning it clockwise shortens the pendulum, which speeds up the clock. A counterclockwise turn lengthens it, making it run slower.
To determine the correct speed, check how far off the time is over a 24-hour period. You can use the atomic clock for reference or your mobile phone, and move the hour and minute hands to sync with the correct time.
After 24 hours, verify if the clock is in-sync with the correct time. If the clock’s still running faster or slower, make the necessary clock pendulum swing adjustment. Remember, it takes about a complete turn of the nut to move the time a minute up or down. Repeat the pendulum clock adjustment procedure every 24 hours until the clock’s time is synced to your phone.
There may be times when adjusting the nut just doesn’t work, possibly because parts of the old clock might need a little attention and care. The bob could be tight or frozen, or the pendulum has stopped swinging altogether, making adjustments nearly impossible. In such a case, you’d need to do a little maintenance.
Take out the pendulum and lay it on a flat and clean working surface.
Leave a drop of synthetic clock oil on the threaded adjustment rod where the bob is screwed on.
Make sure the top part of the nut is in the slot and turn it up and down to spread the oil evenly.
Continue to do so until you feel the rotation is smooth.
Adjusting the beat
 A man adjusts the time on an antique grandfather clock. (Source: iStock)
A clock is in beat if the time interval between the ticks and tocks is evenly spaced. You can test this by swinging the pendulum and carefully listening to tick and tock. If they sound uneven, your clock won’t run smoothly. To learn how to adjust a grandfather clock pendulum to run in the right beat, here are a few tips:
If mounted on a wall by a single point, try holding the bottom of the clock and moving it left or right until you hear that it’s in beat. You can use a leveling tool for more accuracy.
In the case of grandfather clocks, you’ll have to measure the beat using tape. Mark the centre of the pendulum in its natural position and manually swing it on both sides to listen and mark the tape where it ticks and tocks.
To adjust, you’ll have to go to the end of the pendulum rod and find the crutch. Bend the crutch rod until the right beat is achieved.
You also might need to check the movement of the pendulum leader where the pendulum is attached to. Remove the pendulum first and carefully move the pendulum leader left to right or vice versa until it almost starts moving by itself. It should have equal movement from the dead centre to the right and to the left before re-attaching the pendulum.
Adjusting the chime
 A classic pendulum clock mounted against a detailed wooden panel. (Source: iStock)
A part of most grandfather clocks’ accuracy is its chime feature that’s activated every 15 minutes in most cases, playing the entire melody at the top of the hour. When a clock is out of sync, adjusting the chime on a pendulum clock may also be needed.
Before making adjustments, stop the pendulum from swinging. Move the minute hand clockwise slowly until the clock chimes, and note the location of the hand.
The minute hand is not in the proper position if it doesn’t chime correctly at the 3, 6, 9, or top of the hour mark. You’ll need to adjust this by loosening the nut holding the minute hand in the middle of the clock. Pro tip: Use needle-nose pliers to remove the hand if the nut is tight.
With the hand off, move the centre bushing of the minute hand to the correct position using the pliers.
Reinstall the minute hand and tighten. Move the hand clockwise once again until it hits the proper timing chime. You’ve successfully made the necessary adjustment if your clock delivers the correct chimes at the 15, 30, 45, and top-of-the-hour marks.
Let it stand the test of time
Anything that’s well taken care of can last longer, which is the reason why you have Nan’s clock that’s been handed down for generations. Of course, a little clock repair and maintenance is the key to making sure this happens, and perhaps our grandfather clock maintenance guide is just what you need.
But if you are more confident to leave it to the experts, you can have a look at our clock repair price guide. Hire a professional to take care of it for you. Book a Tasker today!
FAQs about adjusting a clock pendulum
Most pendulum clocks only need adjusting when you notice they’re running too fast or too slow—typically every few months.
This could be due to temperature changes, uneven surfaces, or internal wear. If the issue persists, professional servicing might be needed.
Not directly. However, if the clock is out of sync, the chime may strike at the wrong time, so adjusting both the pendulum and chime mechanisms may be necessary.
Find clock repair experts, fast
Find a clock repair expert
Related price guides

How much does treadmill repair cost?
Read more

How much does awning repair cost?
Read more

How much does hot tub repair cost?
Read more

How much does signage cost?
Read more

How much does window repair cost?
Read more


Related articles

How to install curtain rods
Read more

Best blue-collar jobs on Airtasker
Read more

How to Soundproof a Room
Read more

30 Lovely pantry door ideas
Read more

Learn how to cut a mirror in 7 steps
Read more

How much can you earn as a handyperson?
Read more

Install a screen door in 6 steps
Read more

How to fox proof your chicken coop
Read more