- Home/
- Guides/
- Garden Designers/
- How to Build Garden Steps
Stairway to heaven: How to build garden steps for a prettier outdoor haven
Breaking down the process of garden step construction
Published on

Written by Milafel D.
Contributor
Read more about our contributor
Key Facts
- Proper planning is crucial for building garden steps, as factors such as layout, slope, soil type, and step dimensions can affect their stability, safety, and aesthetics.
- Different materials have unique advantages. Stone and brick offer durability, concrete is cost-effective but prone to cracking, and timber is affordable but requires regular maintenance.
Whether you’re in a classic weatherboard in the suburbs or a modern home with a landscaped backyard, well-built garden steps can make your outdoor space easier to use and nicer to look at. The challenge is knowing how to build ones that are safe, sturdy, and don’t blow the budget.
This guide walks you through everything you need to know — from the tools and materials required to the step-by-step build process, plus a few handy tips along the way.
What tools do you need to build garden steps?
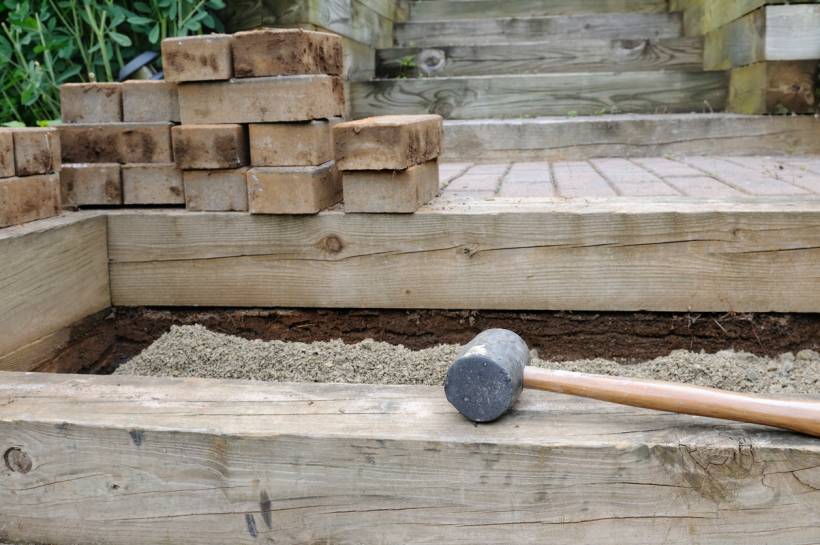 Work-in-progress view of garden step installation using wood, bricks, and a compacted base (Source: iStock)
Building stairs in a garden demands precision for user comfort, stability, and safety. A well-planned path is also aesthetically pleasing, even cohesive. All these begin with having the right tools and equipment.
A gardener specialising in landscaping or building garden steps usually invests in the following:
| Tools | Description | Examples |
|---|---|---|
Measuring and marking |
Ensure the steps are evenly spaced and aligned |
Tape measures determine the exact distances, widths, and depths of steps. Builder squares ensure that all corners form or maintain the correct angles between steps. Laser or spirit levels check for flatness. Builder’s lines mark parallel lines, keeping the steps straight or aligned. Chalk lines, markers, and pencils mark straight guidelines on surfaces like wood or concrete. |
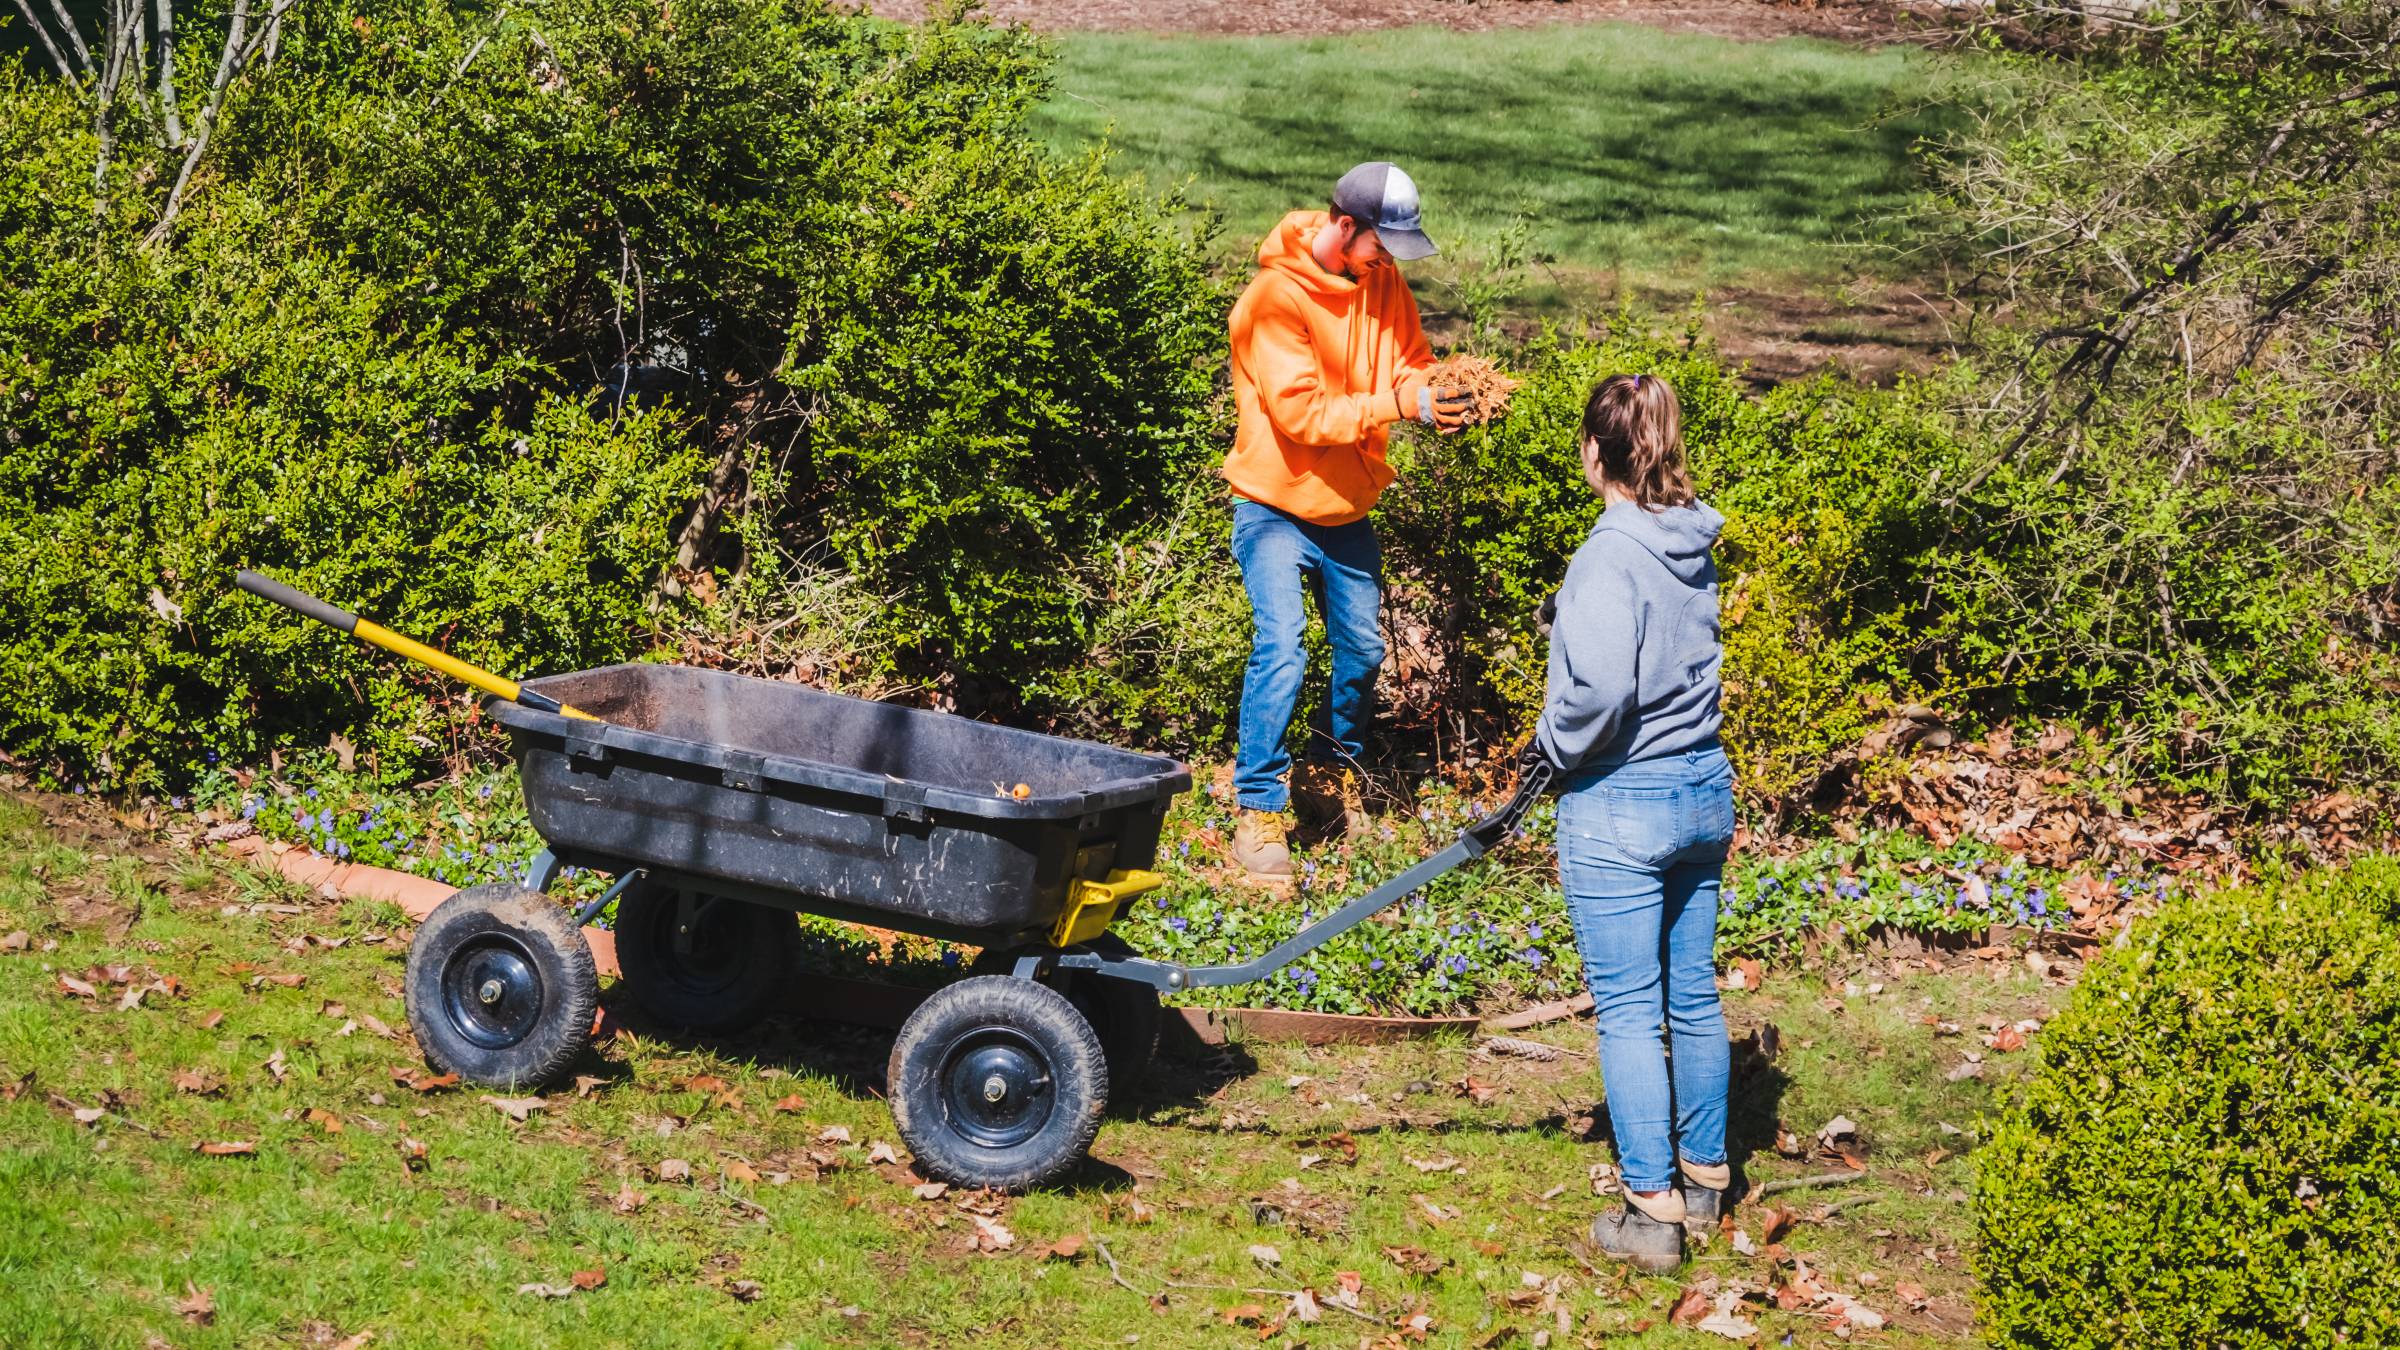
Excavation and ground preparation |
Dig the area where you plan to put the steps |
Shovels or spades dig and move soil or gravel. Mattocks or pickaxes break up compacted soil or rocky ground. Rakes level the ground and remove debris. Wheelbarrows carry soil, gravel, or heavy materials. Tampers or hand compactors compress soil or gravel to create a stable base. |
Cutting and shaping |
Shape garden stairs materials, such as concrete footing to support the base structure or concrete pad to develop a firm, level surface |
Handsaws cut wood for wooden steps. Circular saws cut thicker wood or composite materials quickly Stone chisels and hammers chip away at stones or concrete for shaping. Angle grinders with diamond blades cut stone, concrete, or brick. |
Fastening and assembly |
Secure materials together |
Hammers drive nails into wood or secure forms for concrete. Drills and screwdrivers install screws or bolts for wooden steps. Masonry drills add holes into concrete or stone for anchors. Rubber mallets gently tap bricks, pavers, or stones into place without breaking them. |
How do you plan garden steps?
Now that you have the tools to build your garden steps, the next step is careful planning.
1. Assess your outdoor space
When making garden steps, focus on three crucial elements: garden layout, slope influence, and soil type.
Garden layout
The garden layout refers to the arrangement of different elements in your outdoor space. It affects the functions, aesthetics, and accessibility of your steps. If you hire a landscaper, this professional might consider the presence of an existing garden wall. Can it provide structural support? How does the existing wall influence the overall garden design? How many steps can you make?
You might also need to know whether the garden steps connect to the front or back door. Front steps must create a welcoming entrance and a smooth transition to the garden pathways. Back steps might prioritise functionality, providing convenient access to patios for outdoor dining, sheds for storage, or garden beds for your flowering and food plants.
Slope
Another factor is the slope, which partly dictates the project’s safety, durability, and maintenance requirements. Otherwise, the garden steps could only increase the risks of slips, trips, and falls, as well as soil erosion.
The slope determines whether you need someone to level the area and the number of steps, heights, and widths. Usually, a gentle slope or a slight fall can benefit from wide, shallow steps. Building garden steps is more complicated when the slope is steep. It might require additional structures for stability (to prevent soil shifting), such as retaining walls, landings between steps, and deeper footings.
Soil type
Lastly, there is soil type. Australia has various soil types due to its diverse climates, geographies, and vegetation. Each requires a different approach to building a garden. For example:
Sandy soil is loose and drains too quickly, making it prone to shifting and erosion under garden steps. You might need compacted gravel or concrete footing strips to stabilise the base and reinforce the steps with brick, stone, or concrete blocks.
Clay soil expands when wet and shrinks when dry, leading to cracking and movement in garden steps. A probable solution is installing deep concrete footings with proper reinforcement, adding drainage channels to prevent water buildup, and using retaining walls for extra support.
Peaty soil, common in Tasmania and Victoria, has a high moisture content. It can cause wooden steps to rot and concrete to degrade over time. You should avoid untreated wood and seal concrete and stone steps.
Black earth, or vertosol, in the country’s savannas has a high organic content but is often loose and prone to compaction. Consider replacing the top player with crushed stone for stability.
Analysing garden layout, slope, and soil type guides material choices, safety, comfort, functionality, aesthetics, and accessibility.
2. Measure and calculate step dimensions
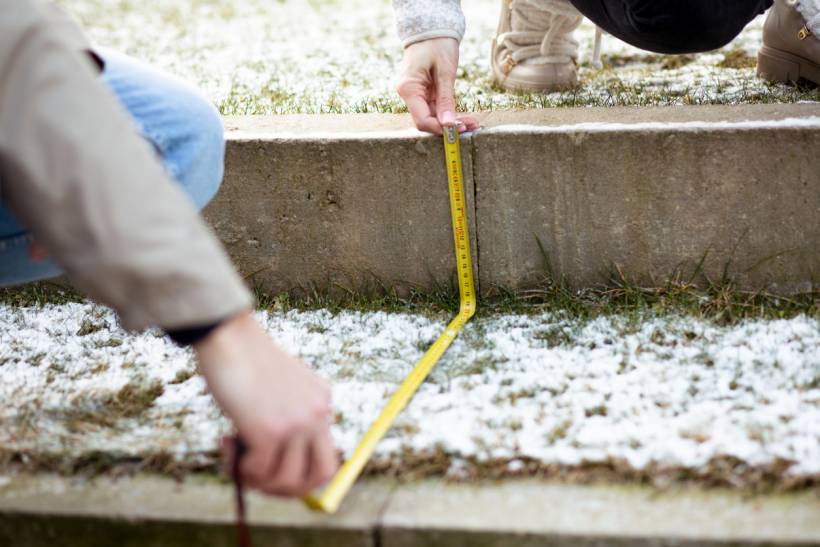 Garden step measurement for planning or adjusting outdoor steps and pathways (Source: iStock)
Once you have assessed the space, you are ready to proceed to the next phase of the garden step building or construction, which is measuring step dimensions.
First, here are a few terms to remember:
The step tread, or going, is a flat surface on which the person steps. Its depth must be wide enough for walking comfort.
The riser is the vertical face of a step, connecting one tread to the next. Its height determines how high a person should lift their foot to reach the next step.
The front edge overhangs the riser, providing more space for proper foot placement to prevent slips.
The landing is the flat platform between flights or steps. Consider adding it every 10 to 12 steps to provide enough breaks and comfort, especially for children and older people.
Step dimensions are the combined measurement of tread depth and riser height.
Australia has strict guidelines when it comes to garden steps, specifically stairs, which should follow the same standards as indoor stairs.
In general, a single flight should have no more than 18 risers, which should have the same measurements as the treads. The slope must be between 20 and 45 degrees, with the most comfortable range being 30 to 38 degrees.
All treads and top nosing must have a non-slip finish, while risers that are more than 18 need a landing. Depending on the rise, handrails might be necessary.
Step 1: Determine the total rise
Using a level, measure the vertical distance (the total height of a slope’s top-to-bottom levels). Then, divide the number by your preferred riser height to determine how many treads you need (round up to the nearest whole number). Usually, it is between 152mm and 203mm, which is the natural stride of an average adult.
For example, the total rise is 100cm or 1,000mm. If your ideal riser height is 178mm, you must have six steps.
Step 2: Know the tread depth
Determine the tread length or depth by calculating the total horizontal distance or the run, which is from the nosing or front edge of a step to the next. Then, divide the number by the total steps.
As mentioned, your hypothetical garden steps have six. If the run is 2,500mm, the tread depth is 417mm per step. This ensures that each step is deep enough for comfortable walking and a smooth transition along the slope.
Step 3: Mark out the step area
After measuring the tread lengths and heights, you can now outline the marked-out area. Using chalk, create two parallel lines to guide your step’s layout. Note that the first tread should align with the ground level and that every step should be aligned and evenly spaced.
Notes:
Always refer to your city’s or council’s building codes before you start the garden steps construction to avoid paying fines or redoing the work.
Although the ideal riser height is from 152mm to 203mm, the more realistic measurement might be lower or higher, depending on many factors, such as the slope’s steepness.
An existing wall can affect the step dimensions, specifically the depth or length. If it limits the horizontal space, each tread might be shorter. When the wall creates a sharp transition, such as a raised patio with no space to add more steps, the whole project might also require a landing.
Choose materials for your garden steps
 Rustic wooden garden steps integrated into a landscaped hillside (Source: iStock)
Stone
Natural stone, such as granite, sandstone, and slate, is one of the most classic and durable materials for garden steps. They feel organic, are weather-resistant, and last a long time, making them ideal for high-traffic pathways and sloped gardens.
However, due to quarrying and transportation costs, they can be expensive to use when constructing garden steps. The large flat stones need wide, stable treads (or low risers and deep treads) for stability, although they are easily shaped with minimal cutting.
Brick
An excellent alternative to natural stones is bricks. Traditional and warm, this material works well in both modern and classic garden designs, such as Victorian or cottage homes. This is due to its various pattern options, like herringbone and basketweave. Stretcher bond bricks can also create a uniform, patterned look for better style and stability.
The problem is that it is prone to moss and algae, especially in wetter regions, and can shift or sink, depending on the soil type. For strong vertical support, you can strengthen it with brick risers or a brick wall. Engineered bricks, which are clay exposed to high temperatures to make them less porous and more weather-resistant, are pricier but denser and more durable.
Concrete
Concrete steps are low-maintenance but modern options. They are sleek, durable, and budget-friendly. Concrete slabs are also highly versatile, especially with their textures, colours, and designs. You can keep their steps wide and smooth for a clean and uniform finish. If you add treads, they can become non-slip surfaces, ideal for households with children and older people.
However, they are susceptible to cracking when not appropriately reinforced. Some are also highly porous, increasing the risk of moisture. Once set, they can be heavy and challenging to change.
Timber
Timber steps are the cheapest option. Those who prefer to DIY their garden steps can consider this material. It is lightweight and easy to install. Timber also exudes warm, rustic vibes, making it an excellent choice for homesteads or properties with decks and natural landscapes.
One of its biggest cons, though, is that it is less long-lasting than stone, brick, and concrete steps. Timber needs regular maintenance, such as sealing or staining. Because of its porosity, it can quickly rot or warp, and termites can also shorten its lifespan.
If you want to stick with timber, consider engineered wood, which is more durable and moisture-resistant. Another choice is railway sleepers, which you can stack up for better support. Lastly, get help from a carpenter to reinforce the structure.
How can you design garden steps that match your style?
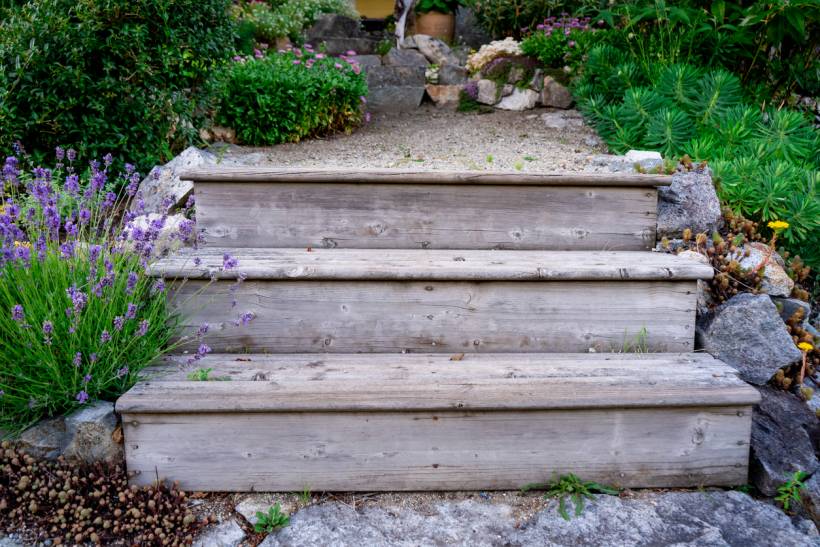 Garden steps made of weathered wood, set between rocks and flowering plants (Source: iStock)
Whether you prefer classic elegance, modern simplicity, or a natural look, selecting the right materials for your garden steps keeps them stylish, functional, and safe. Here are the options and when to choose (or avoid) them:
Stick to the classics
Brick steps, natural stones, and paving slabs are the best options if you’re looking for a classic, sophisticated, traditional, and structured aesthetic. Brick and natural stone can preserve the character of heritage homes and enhance hedges, fountains, and classic pathways in formal gardens. Paving slabs also work well on small- to medium-sized garden steps in suburban homes.
However, if your property is on a steep slope, you might need to reconsider bricks. The project would require multiple layers of risers, which are expensive and prone to shifting later. Your next best choice is paving slabs, but they can become slippery and unstable on steeper gradients. Installing natural stone on loose or soft soil can be challenging. Without a concrete footing, it can also sink or settle.
Embrace the modern or contemporary
Concrete steps, slabs, and artificial grass are cheap, structured, low-maintenance, and versatile options for more modern gardens.
These materials blend with glass, steel, and industrial-style designs to create a clean, minimalist look for urban homes. They also integrate seamlessly with multi-level outdoor spaces because they are easier to tier, cut, or mould.
However, these contemporary garden steps have challenges. Concrete steps can crack over time, especially in regions with frequent freeze-thaw cycles. Slabs can also cause water to pool and for algae and moss to grow, increasing the risks of slips and falls. Meanwhile, grass cannot work in steep inclines because it can detach, shift, and wrinkle.
Complement the existing landscape
For a seamless, natural look for your garden paths, materials should integrate smoothly with your design, terrain, and existing structures. For example:
Using local natural stone or timber helps preserve the rustic charm of traditional properties or countryside homes.
If you have an existing wall, matching materials (e.g., brick or stone) to create sloped gardens with a retaining wall helps maintain visual continuity.
Natural materials blend well into permaculture landscapes and wildflower gardens often found in eco-friendly or sustainable properties.
Nevertheless, if the existing wall has cracks or instability, adding steps next to it can worsen structural issues. A separate supporting wall is necessary. Poorly drained areas should avoid solid concrete slabs unless they have built-in drainage channels. Lastly, in heavily shaded areas, materials such as brick or paving slabs can accumulate moss and algae, leading to slippery surfaces.
How do you construct garden steps?
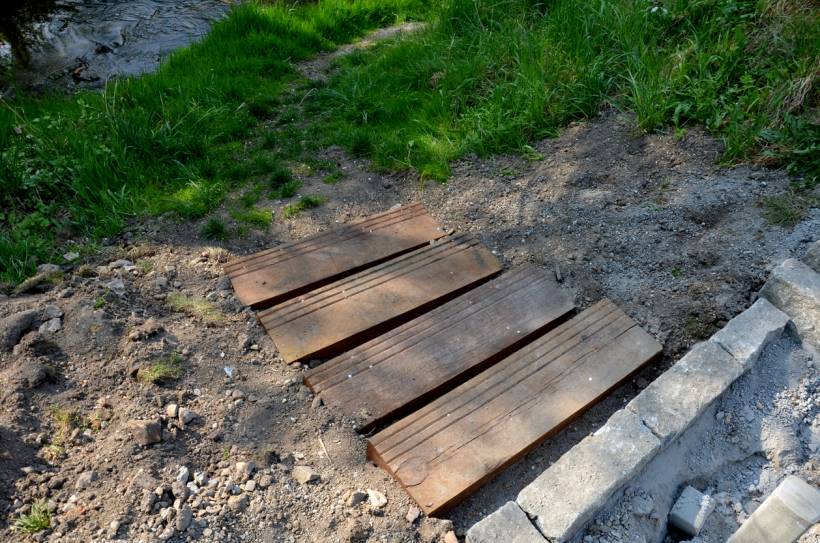 Early stage view of garden steps in progress along a dirt pathway (Source: iStock)
By now, you already know the materials you need, the slope and step tread, and the number of levels for your garden steps. You are ready to build them. The best option is to hire a professional. Their craftsmanship and experience can help save money in the long term and prevent irreparable mistakes.
But just to give you an idea of how to build garden steps, read the guide below:
1. Prepare the site
The first step in creating garden steps is preparing the site. First, check if you need a permit to build outdoor structures. Then:
|
☑️ Plan the layout. Measure the total rise and run. Mark the path with stakes and string so the steps align with the garden’s natural flow. ☑️ Clear the area. Using a shovel or spade, remove grass, plants, rocks, and debris from the site. Dig out any roots or large obstacles to prevent instability later. ☑️ Excavate the slope. Start at the bottom and work your way up. Dig out the shape of each step, creating flat ‘shelves’ for the treads and vertical cuts for the risers. Aim for a slight backward slope (about 1/4 inch per foot) on each tread to allow water to run off (or prevent water pooling). ☑️ Prepare the base. Lay down landscape fabric to suppress weeds and stabilise the soil. Add a 101.6mm to 152.4mm layer of gravel or crushed stone to each step’s base. Spread it evenly with a shovel. Compact the gravel tightly using a tamper or plate compactor to create a solid foundation. ☑️ Test and adjust. Place temporary materials (e.g., scrap wood or the actual step materials) to test the layout. Walk up and down to determine whether the rise and run feel natural. Adjust as needed by adding or removing soil. ☑️ Finalise the prep. Double-check measurements and levels. Ensure the base is firm and will not shift under its weight. |
2. Follow the building process per material
Different materials require different building approaches. Here are the basic steps when working with wood, brick, and concrete. Please note that these follow after preparing the site:
Wooden steps
|
☑️ Mark and prepare the ground. Outline the area where the steps will go. Use wooden stakes and builder’s line to create two parallel lines as guides. Dig a shallow trench where you plan to put each step. Add a gravel or concrete base to each trench for extra support, especially in soft soil areas. ☑️ Cut and position the step risers and treads. Cut your timber planks to the measured sizes for the risers and treads. Position the first riser at the bottom and secure it in place with wooden pegs or stakes. Attach the tread to the riser using galvanised screws to prevent rust. Check alignment with a spirit level before securing further. ☑️ Secure the steps in place. Use heavy-duty screws or brackets to reinforce each step. If using railway sleepers, consider drilling through and securing with long bolts. If the steps are on a slope, use stakes behind each riser to prevent shifting over time. ☑️ Create proper drainage and add finishing touches. Slop each tread slightly forward to ensure water drains properly. Add a weed membrane under the steps to prevent unwanted plant growth, and treat the wooden garden steps with outdoor sealant to protect against moisture and pests. |
When do you use stringers in wooden steps? A stringer supports the treads and risers. If your garden has a slope, stringers are essential. They’re typically cut with a zigzag pattern (notched) to securely hold each tread and riser, transferring the load to the ground or a foundation.
Brick steps
|
☑️ Dig and lay the concrete footing. Dig a trench about 150-200mm deep for the base of the steps. Fill it with compacted hardcore (gravel and crushed stone) for stability. Pour a concrete footing (at least 100mm thick) to provide a solid foundation for the brick steps. Let the concrete cure for 24-48 hours before building the steps. ☑️ Lay the step base. Start laying the stretcher bond bricks, putting them lengthwise in a staggered formation for even weight distribution and a clean, uniform look. Use a trowel to apply mortar between each brick for strong adhesion. Check alignment with a spirit level before moving to the next row, tapping bricks gently with a rubber mallet to keep them even. ☑️ Build the risers and treads. Lay bricks to form the risers. Typically, two bricks stacked horizontally make up a single riser height. Position the treads by extending the bricks slightly beyond the riser, creating a front edge for each step. Alternatively, lay paving slabs on the treads for a smoother walking surface. Fill mortar into all joints and brush off excess for a clean finish. If you want a more gradual climb, especially in sloped gardens, widen and deepen the steps while adding railings for extra safety on taller steps. ☑️ Check the alignment and finish the steps. After placing each layer of your brick garden steps, use a spirit level to ensure the steps are even. Allow the mortar to set for at least 24 hours before walking on the steps. Sweep off any excess mortar and clean the bricks for a polished look. |
Concrete steps
|
☑️ Excavate and prepare the foundation. Dig trenches for each step for stability. Add a 100mm layer of compacted gravel for drainage. If the ground is unstable, lay concrete footing strips under the steps. Dig deeper trenches at the lower end to keep the steps level in sloped grounds. Use a tamper to compact the ground to prevent future sinking. ☑️ Build the formwork or the step moulds. Cut plywood or timber planks to create moulds for each step. Secure the formwork with wooden stakes so it follows the correct step dimensions. Use a spirit level to check alignment before pouring concrete. Apply a thin layer of oil inside the moulds to prevent the concrete from sticking. ☑️ Reinforce and pour the concrete. For added strength, place rebar or mesh reinforcement inside each step form. Mix the concrete in a concrete mixer or wheelbarrow. Pour the concrete mix into the formwork, filling each step evenly. Use a tamper to remove air pockets and compact the concrete. Smooth the surface with a float, slightly sloping each tread forward for water drainage. Let the concrete cure for 24-48 hours before removing the formwork. ☑️ Install concrete slab treads (optional). If you want a smooth, decorative finish, lay precast concrete slab treads on top of the steps. Place the slabs on a mortar bed to ensure a secure, level fit. Leave a gap between slabs to allow for expansion. Press down with a rubber mallet to avoid cracking. ☑️ Remove formwork and finish the steps. After 48 hours, carefully remove the wooden formwork of your concrete garden steps. Brush off excess dust and clean the surface with water. Apply a concrete sealer to protect against weather and wear. If you prefer a textured finish, use a broom to create slight grooves before the concrete sets. |
3. Add safety features
Many older adults in Australia experience a fall annually. Although most do not result in severe injuries, others can cause broken bones and death. One way to prevent this problem is to improve outdoor safety, including in the garden.
When designing garden steps, incorporate the following safety features:
Apply a broom finish, textured concrete, or anti-slip strips to prevent slipping, especially in wet conditions.
Make riser heights and tread depth consistent to avoid tripping hazards.
To protect against moisture, cracks, and mould growth, waterproof the materials with a concrete sealer, brick sealant, or wood treatment.
Slightly slope each tread forward or install small drainage channels to prevent water pooling.
Add sturdy metal, wood, or rope railings for support, especially on steep steps.
Install lights, such as solar, LED strips under treads, or motion-sensor lights, to enhance visibility at night.
Clean steps regularly, remove moss or algae, and repoint mortar or replace damaged boards to prevent hazards.
How can you connect spaces with garden steps?
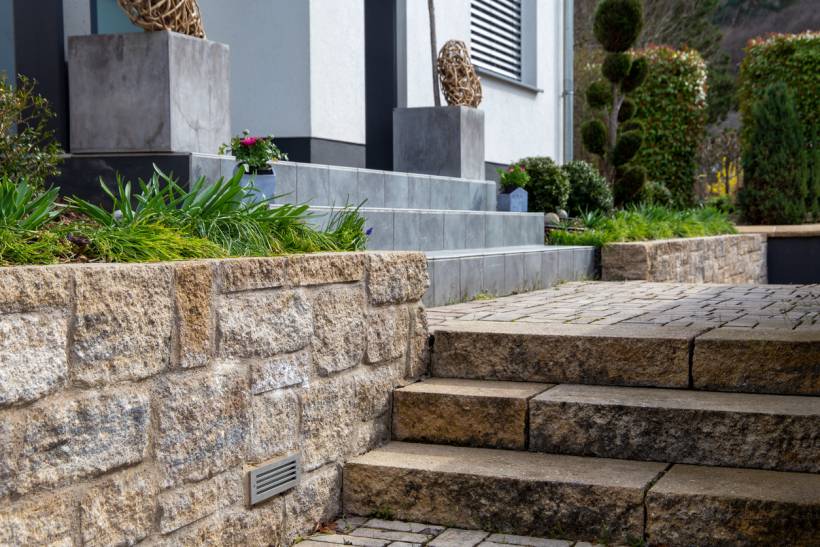 Completed garden steps creating a polished transition from walkway to home entry (Source: iStock)
Poor space flow can contribute to significant problems, including awkward transitions, uncomfortable navigation, increased risks of trips and falls, and erosion. Follow these tips to avoid it.
Build steps leading into the garden
Building steps into a garden from your home can make the outdoor space feel more inviting. Steps from the patio to the garden can create a seamless flow between your outdoor living space and the surrounding greenery.
Wide, shallow steps with natural stone or paving slabs work well for open garden entrances. Curved steps can add a soft, organic feel and blend into the landscape. Pair garden steps with planted borders or decorative edging for a more natural transition.
Build steps between levels
In sloped gardens, steps help define different areas while making the terrain more accessible. Create steps on natural inclines to prevent erosion and make steep areas walkable.
Tiered steps with landings work best for long staircases, breaking up the climb into smaller, manageable sections. Retaining walls with built-in steps can separate different garden levels while adding structural support. For a cohesive look, use the same material as the surrounding walls or pathways.
Build steps connecting key outdoor activities
Build steps in a garden to connect areas like seating zones, fire pits, pools, or garden beds. For example, use flat stepping stones embedded in the grass for a subtle transition or place timber sleeper steps along a winding gravel path leading to a shaded pergola or pond. In sloped gardens, install brick or concrete steps within a curved pathway to guide visitors from a patio to a hidden garden nook or fire pit area.
How do you keep garden steps stylish?
A beautiful garden can increase the property’s resale value by as much as 20%. But even if you do not plan to sell the house, well-maintained gardens with stairs can improve your mental and physical health due to aesthetics.
To maintain their beauty, keep your steps clean and free of dirt, moss, and algae buildup. If you have a garden cleaning crew, ensure they regularly sweep, power wash, or scrub the steps to prevent stains and slippery surfaces. For DIY maintenance, use mild soap and a stiff brush to clean brick and stone, and seal wood or concrete to help protect against weather damage.
Incorporating decorative elements can also enhance the style of your garden steps. For instance, if you live in a cottage home, you can add iron railings or symmetrical plant arrangements to natural stone steps. Wildflower borders, soft pathway lighting, and stone or wood edging can also benefit rustic and countryside gardens.
Step into a better outdoor space with Airtasker
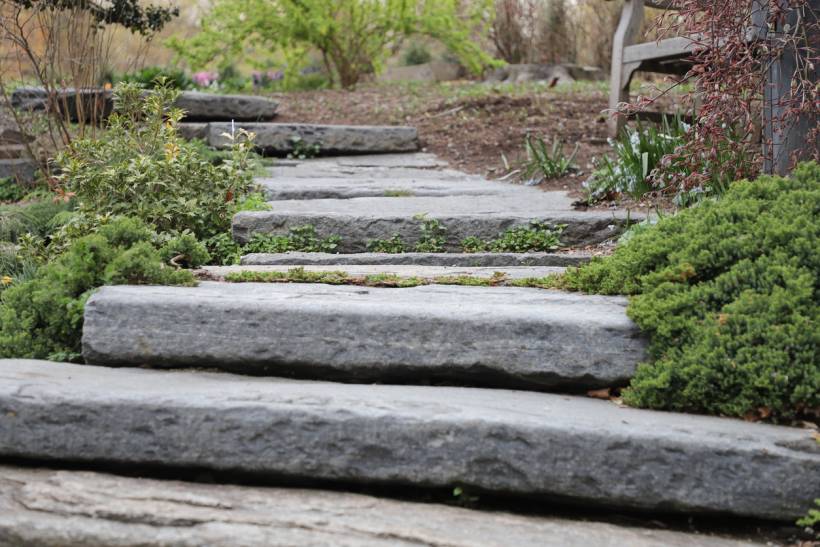 Natural stone garden steps set into a landscaped hillside with low shrubs and ground cover (Source: iStock)
Whether you need help with choosing the right materials, improving step flow, or understanding how to construct garden steps, hiring an experienced tradesperson can save you time and effort while achieving the best results.
Airtasker makes it easy to connect with experienced garden designers, landscapers, and masonry specialists who can bring your vision to life. Here’s how to get started:
Post a task for free. Describe your project, including the size, materials, and style of steps you want.
Get offers from skilled Taskers. Browse ratings, reviews, and portfolios to find the right expert for your needs.
Discuss the details. Work directly with your chosen specialist to finalise design, costs, and timelines.
Ready to transform your outdoor space? Find a trusted expert on Airtasker today!
Learn more about our contributors
Written by Milafel D.
Contributor
Milafel is an editor and writer with over 15 years of experience. As a contributor to Airtasker content, she brings clarity, creativity, and insight to every piece to help homeowners tackle everyday challenges and turn their living spaces into something truly special. When she’s not writing, Milafel is a devoted cat mama and a teacher’s wife who enjoys belting out tunes at karaoke, journalling her thoughts, and pursuing passion projects.
FAQs on building garden steps
No, you generally do not need a permit when constructing garden steps on slopes if they are unattached to retaining walls and thus a separate feature. To be sure, talk to your local council.
To stabilise garden steps on uneven or shifting soil, begin by digging a solid foundation and laying concrete footing strips to prevent movement, and then use compacted hardcore (gravel or crushed stone) beneath the steps for drainage and stability. Finally, consider adding reinforcement such as rebar or retaining edges to maintain the structure’s security over time.
When digging near tree roots for garden steps, avoid cutting large or structural roots. Use hand tools rather than heavy machinery to minimise damage, and if roots are exposed, cover them with mulch or soil to prevent them from drying out.
To include decorative tiles or mosaics in garden step designs, apply a cement-based adhesive to secure the tiles. For mosaics, arrange small tiles in a pattern, pressing them into the adhesive before grouting.
Find garden designers, fast
Find a garden designer
Related price guides
How much does mulch cost?
Read more

How much does garden clearance cost?
Read more

How much does weeding cost?
Read more
How much does a gardener cost?
Read more
How much does hedge removal cost?
Read more

How much does a garden room cost?
Read more


Related articles

Learn how to repot an orchid
Read more

How to prune roses the right way
Read more
How to trim bushes the right way
Read more

25 ways to make money gardening
Read more

13 best spring gardening tips
Read more

36 Quirky plant pot ideas you’ll love
Read more
18 Garden canopy ideas you’ll love
Read more

Gardening tips for beginners
Read more
Your garden maintenance checklist
Read more
How to clean garden rocks
Read more