- Home/
- Guides/
- Disassembly/
- How to Disassemble a Bed Frame
How to disassemble your bed frame in 7 steps
Moving soon? Learn how to take apart your bed frame safely, quickly, and easily!
Last Updated on

Written by Genine T.
Staff Writer

Reviewed by Jacob S.
Handyman Expert
Read more about our contributors
Key Facts
Group all bed parts together before loading so the frame is easier to transport and quicker to reassemble.
If you’re disassembling the bed yourself, take photos along the way to make reassembly quicker and easier.
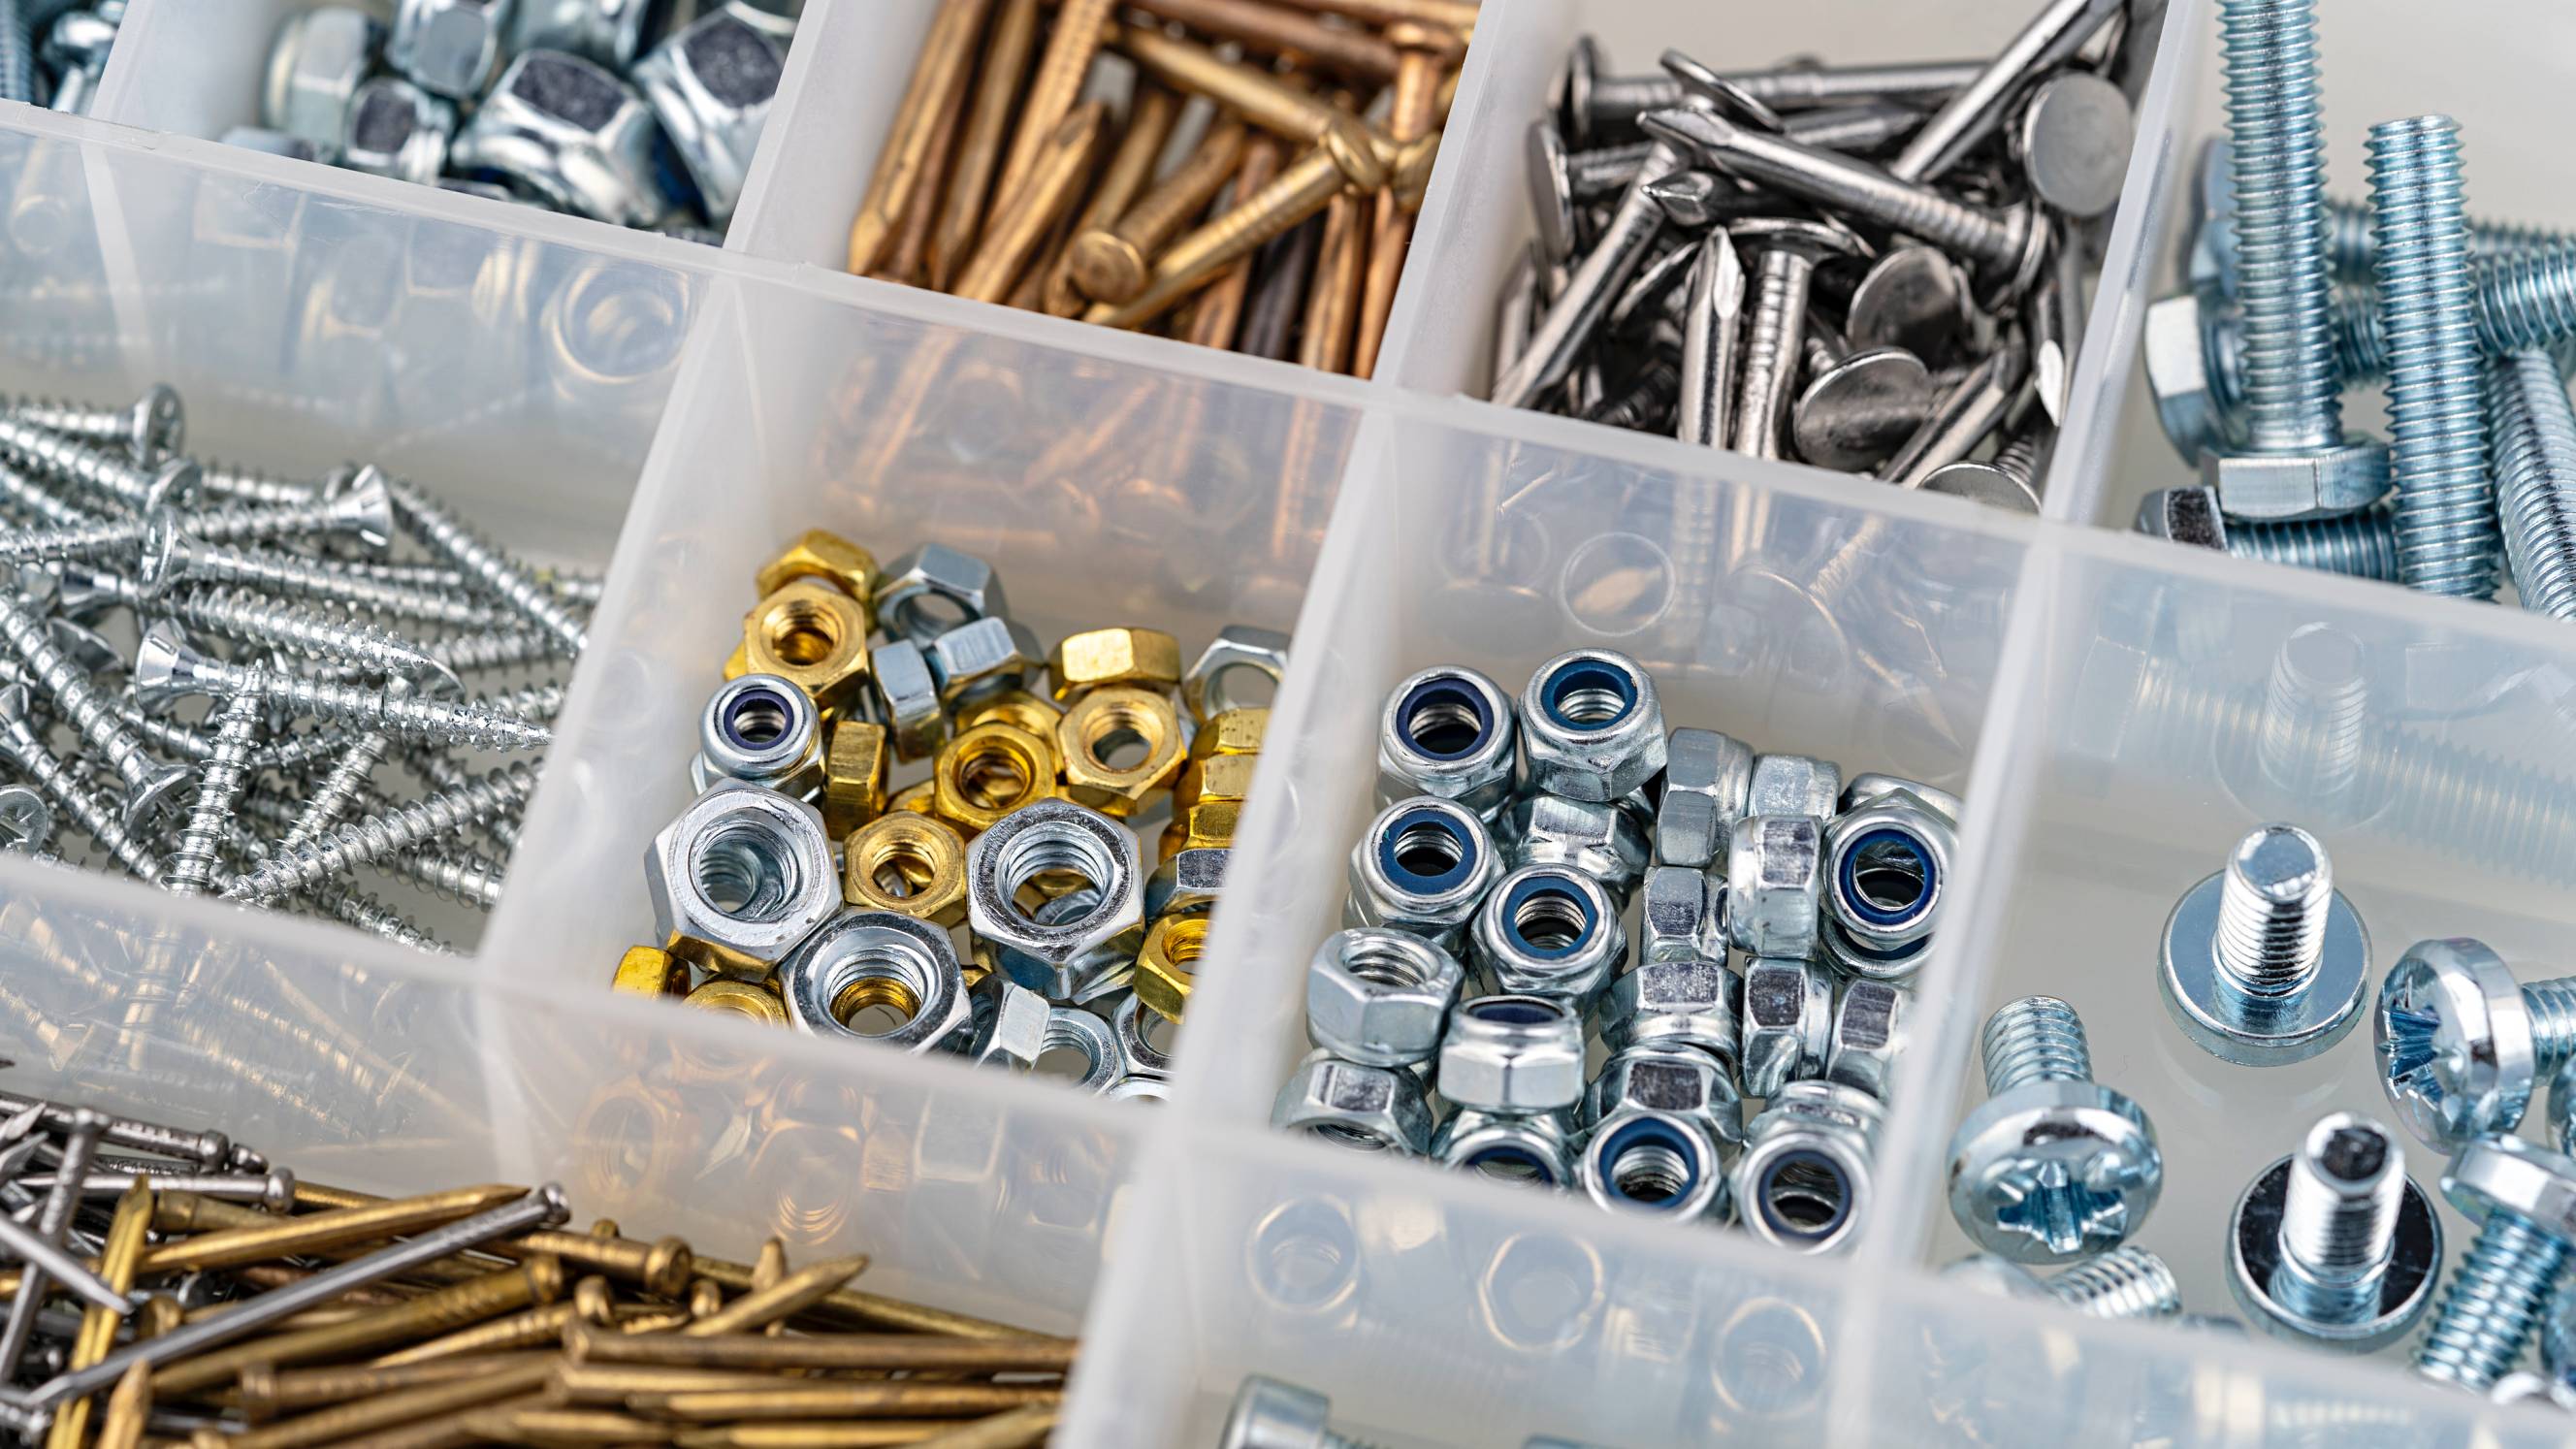
Always keep screws and small hardware in labeled bags so nothing gets lost during reassembly.
When you’re moving apartmenkts or homes, one of the things that you’re probably thinking of keeping with you is your bed. Besides the mattress, an essential part of your bed is the frame—a bulky piece of furniture that can be tricky to move. This is why you need to learn how to disassemble bed frames, so you can load them up with all your other stuff for an easier and faster move into your new place.
There are a few steps to take apart and move a bed frame. Whether you’re moving, switching beds, or need to replace your bed frame, read this guide to ensure you know how to pack a bed frame for moving.
What you’ll need:
Before you get to it, have the following materials ready:
Screwdriver or wrench for your bed frame
Pliers for prying out stubborn parts
Hammer to help loosen or push out connected pieces
Bags or boxes for storing bed frame components
Markers for labeling and organizing parts
Tape to keep smaller pieces or groups of parts together
How long does it take to disassemble a bed frame?
If you have all the tools you need and are familiar with your bed frame, disassembling your mattress takes about 30 minutes. However, it’s normal to encounter hiccups, which could extend this task to an hour.
Steps for taking apart a bed frame for moving
Step 1: Remove the bedding and mattress
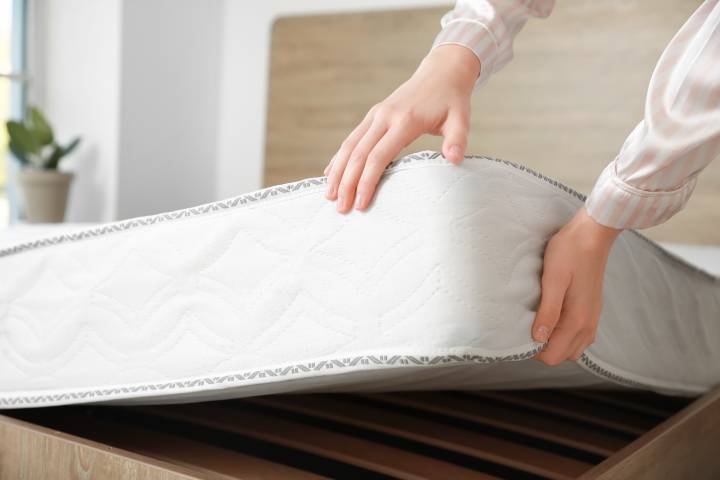
Before disassembling the bed frame, separate it from everything else. Take off the mattress, box spring, and all bedding, including pillows, sheets, blankets, and linens. Make sure to remove any accessories such as headboard covers, bed skirts, or decorative cushions.
Follow these steps:
- Strip all bedding and accessories from the bed.
- Wash and dry everything thoroughly to prevent moisture damage.
- Pack the clean bedding in boxes or bags for transport.
- Lift off the mattress and set it aside.
- Remove the box spring and place it with the mattress.
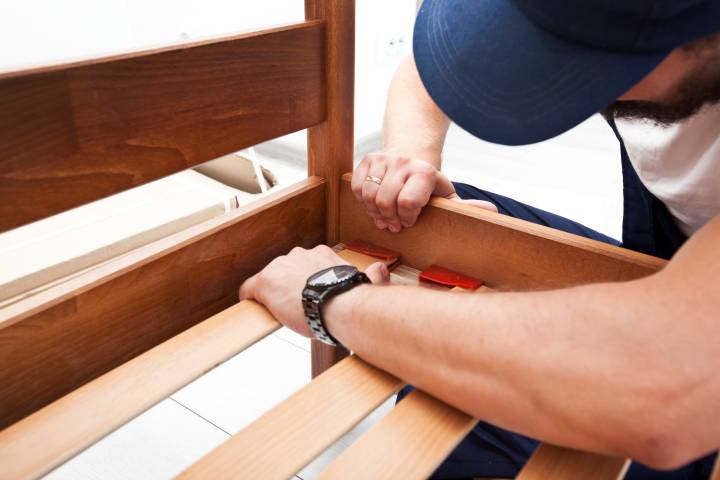
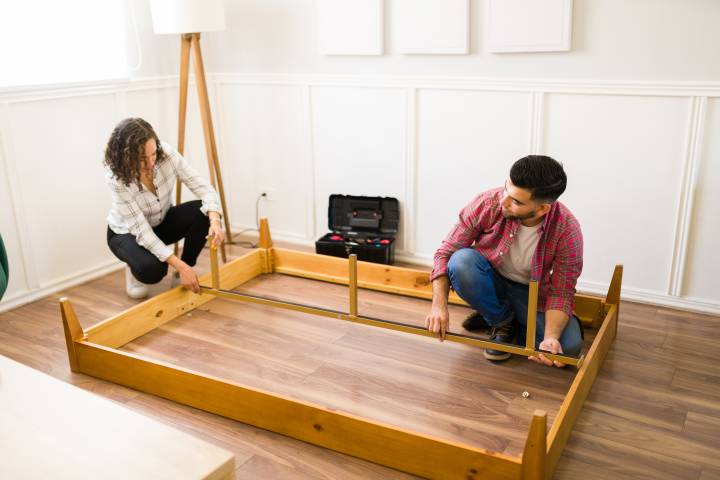
Step 2: Remove the Headboard from the Sideboards

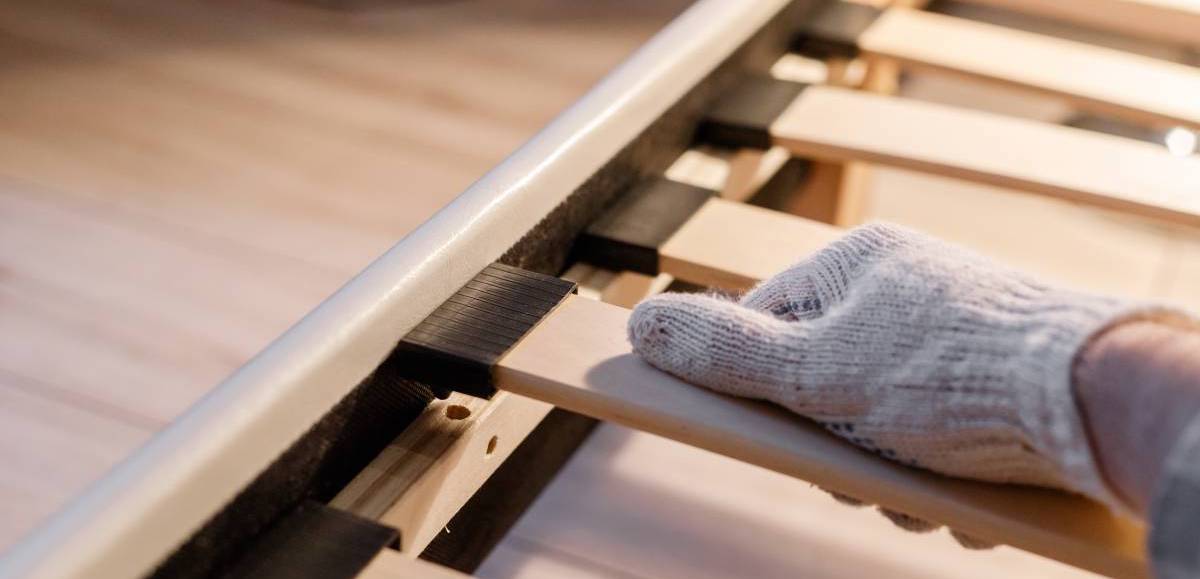
After removing the bedding, mattress, and box spring, it’s time to take apart the frame. A standard bed frame consists of a headboard, footboard, two sideboards, and support slats. Larger frames, such as queen or king sizes, often include a middle support beam, while some styles may also have drawers or a trundle.
Regardless of design, all frames will have the four main components: headboard, footboard, sideboards, and slats. To detach these, follow these:
- Use a screwdriver or wrench to loosen and remove the bolts or screws attaching the headboard to the sideboards.
- If your bed frame includes a footboard, repeat the process on that side.
- Keep any small hardware pieces together in a labeled bag or box so nothing gets lost.
- If your bed has a middle support beam, detach it carefully once the headboard and footboard are free.
Step 3: Remove the headboard and footboard
Once the headboard is detached, move on to the footboard. The headboard and footboard are both connected to the sideboards, and sometimes to a middle support beam, depending on the size of your bed. Removing the footboard frees up the rest of the frame so you can take it apart more easily later.
- Use a screwdriver or wrench to remove the bolts or screws that connect the footboard to the sideboards.
- If your bed has a middle support beam, detach it carefully from the footboard before pulling the piece away.
- Keep all screws, bolts, and small brackets together in a labeled bag or box.
- Label the points where each screw or bolt came from to make reassembly easier.
If this is your first time disassembling and reassembling a bed frame, take a clear photo of each connection point before removing the screws. These photos will make reassembly much easier and can also help later if you ever need to do a bed repair or replace a specific part.
Step 4: Secure the Sideboards and Disassemble Extra Parts
After removing the headboard and footboard, focus on the sideboards and middle support beam. These pieces form the main structure of the bed frame, so keeping them together will make reassembly faster and help prevent damage.
- Carefully detach the sideboards and middle support beam from the remaining hardware.
- Line them up side by side, then use tape to secure them together. This prevents scuffing and keeps all the main frame parts organized.
- If your bed includes drawers or a trundle, remove them next. Detach any sliding tracks or hardware and pack them separately.
- Store all screws, bolts, and small parts in labeled bags or boxes for easy access later.
Step 5: Label and Store All Hardware
Once all the main parts of the bed frame are disassembled, gather every small component before you start packing up. This includes screws, bolts, washers, lock rings, nuts, handles, brackets, and any other hardware that holds the frame together. Keeping these organized is the key to an easy reassembly later.
- Place all hardware pieces in small bags or containers.
- Label each bag clearly to match the part it belongs to, such as “headboard screws” or “sideboard bolts.”
- Keep the labeled bags together in one larger bag or box so nothing gets misplaced.
- If possible, tape the main hardware bag to one of the sideboards or place it inside the box spring area so it stays with the frame.
If you have duplicate hardware or similar-looking screws, group them by size or type before labeling. This saves time during reassembly and reduces the risk of mixing up parts that look nearly identical.
Step 6: Wrap and Protect All Bed Parts
Mattresses and bed frames can easily get damaged during a move if they are not wrapped properly. A mattress can absorb dust and moisture, while bed frame parts often get scratched, scuffed, or dented. Taking time to wrap each piece securely will keep everything clean, protected, and easier to handle during transport.
Wrapping the Mattress
Before moving the mattress, make sure it is completely clean and dry. A well-wrapped mattress not only stays cleaner but also lasts longer after the move.
- Place the mattress inside a mattress bag or a heavy-duty plastic cover to protect it from dust, dirt, and moisture.
- Seal the bag tightly with packing tape so it does not slip off while moving.
- If you do not have a mattress bag, wrap the entire mattress in clean moving blankets and secure them with tape or stretch wrap.
- Keep the mattress upright when possible to prevent sagging and to make carrying easier.
Mattresses are especially vulnerable to stains, odors, and tears during transport. Avoid placing them directly on dirty floors or rough surfaces, and always move them with at least two people to maintain balance and prevent bending.
Wrapping the Bed Frame
Once the mattress is secure, focus on the disassembled bed frame. These pieces are often heavier and more fragile than they appear, so wrapping them properly is key to preventing scratches and chips.
- Cover each part of the frame (headboard, footboard, sideboards, and middle beam) with moving blankets or bubble wrap.
- Add cardboard to corners and edges for extra protection, especially if your bed will pass through narrow doorways or stairways.
- Stack the wrapped parts together and secure them with tape or straps to stay flat and stable during the move.
- Keep heavier pieces at the bottom and lighter ones on top to prevent pressure damage.
Step 7: Load and Secure the Bed Frame for Transport
Once everything is wrapped and protected, carefully move the bed parts to the truck or moving vehicle. How you position and secure them will determine whether they arrive in perfect condition or end up with scratches and dents.
- Stack flat pieces such as the sideboards, middle beam, and slats along the wall of the truck to keep them stable.
- Place larger items like the headboard and footboard upright, standing against the truck wall to save space and reduce pressure on delicate surfaces.
- Use moving blankets or cardboard between pieces to prevent rubbing or shifting during the drive.
- Secure everything with load straps or bungee cords to keep the parts from moving around in transit.
- Double-check that nothing can slide, tip, or bump into heavier furniture during the move.
Moving your bed frame
Disassembling a bed frame that needs to be moved is a simple process that can be made even easier with proper knowledge and organization. If you’d rather skip the hassle of taking it apart yourself, you can hire a Tasker to handle your bed's disassembly and reassembly.
Post a task on Airtasker and let a local expert handle your bed. From start to finish, the job gets done for you without the stress!
Learn more about our contributors
Written by Genine T.
Staff Writer
Genine is a writer and educator with over seven years of experience. She has published peer-reviewed research papers, worked in academia, and created educational content for thousands of language learners. She discovered her passion for turning complex ideas into practical advice through writing about DIY topics like home improvement, furniture assembly, and household fixes. When she’s not writing, Genine enjoys curling up with her dogs and a good book.
Reviewed by Jacob S.
Handyman Expert
Jacob is the owner of Stress-Less Services, a Los Angeles-based handyman business known for reliable and efficient home services. Jacob brings hands-on experience in everything from TV mounting to general household repairs. He regularly handles multiple mounting jobs each week and takes pride in delivering precise, secure installations for his clients.
The Reviewer Badge is awarded to individuals who are experts in their respective fields and evaluate the content to ensure its accuracy and relevance to the task at hand.
FAQs on disassembling a bed frame
Depending on the type of bed frame you have, some tools to keep in handy for disassembling a bed frame are:
Screwdriver or wrench (find one appropriate for your bed frame)
Pliers for prying out parts
Hammer to help push out connected parts
Bags or boxes for storing the parts of your bed frame
Markers for labeling
First, check if your wooden bed frame is made in one piece. If it is, there’s no other option but to turn it on its side, lift the bed frame, and carry it to the moving vehicle. If you can take it apart, first remove the slats, followed by the bed rails, headboard and footboard, dowels, and fixings.
Find disassembly experts, fast
Find a Disassembly expert
Related articles