How to DIY Halloween costumes for your next candy run

We go way beyond two holes in a sheet...

How to DIY Halloween costumes for your next candy run

Anyone can appear in a store-bought costume on Halloween night, but nothing beats the uniqueness of clever DIY Halloween costumes. We have some simple outside-the-box ideas below to help you stand out from the crowd on your next candy run.

You don’t need to be a master crafter for these; you just need a little imagination. Read on for our DIY Halloween costumes and level up next time you hit the neighbourhood for a trick-or-treat.

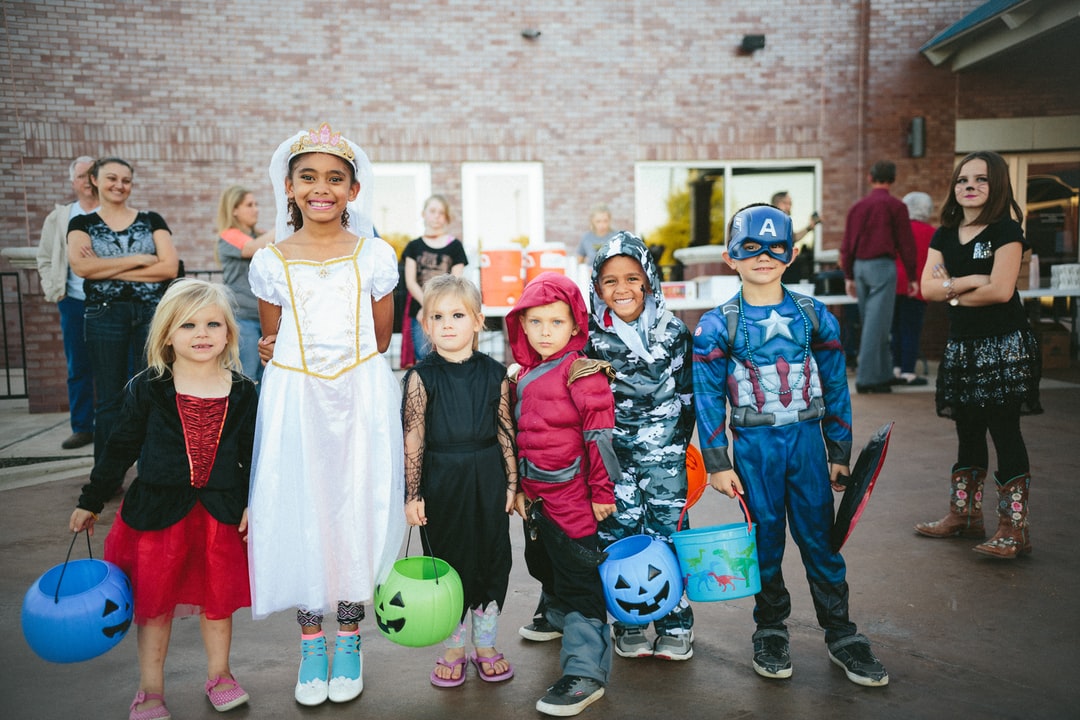
Our favourite DIY Halloween costumes for kids (and how to make them)

We’ve put together a list of easy DIY Halloween costumes to suit those pressed for time and less handy with crafting duties. You don’t need to be Jim Henson for these creations; a totally unique outfit for your kid, or yourself, can be very straightforward.

Costume idea #1: The classic rag doll

Everyone can recognise the classic Raggedy Ann look, and there is nothing better than a combo costume for you and your child.

It’s super easy and only requires clothes from your own wardrobe and some yarn (red is the classic colour of Raggedy Ann’s hair, but feel free to change it up with something else).

You’ll also want some felt strips to match the colours of your yarn, scissors, thread and two simple hair combs.

Cut the yarn pieces to create any wild shape you like for the wig, tie it into pigtails with the felt strips, grab a dress and some fun mismatching accessories, and then finish with a little face paint to create a ragdoll look.

Costume idea #2: The mummy bump

This one is for pregnant women who may have difficulty finding an easy and comfortable selection of DIY Halloween costumes. All you need is a cosy white tee shirt, some toilet paper or gauze, and some drawn or printed spooky eyes. Place the eyes on your bump and wrap yourself up like a mummy, and it will look like you are hatching a hilarious baby mummy!

Costume idea #3: A cup of hot chocolate

This one is a little more involved but very unique! You’ll need the following supplies:

  • 40×60” sheet of cardboard
  • Wrapping paper (in a plain colour of your choice)
  • Poster board (the same colour as the wrapping paper)
  • Spray adhesive
  • Hot glue gun
  • Brown felt
  • Three 4” x36” foam rollers
  • A box cutter
  • Brown elastic
  • Brown Dress or shirt

Step-by-step directions

  1. Cut the foam rollers into four-inch pieces with the box cutter
  2. Cut the cardboard sheet to an appropriate size for the body of your mug (curve it around your body before cutting to ensure a comfortable fit)
  3. Spray the outside of the cardboard piece with spray adhesive, then cover it with wrapping paper
  4. Cut a handle shape out of the poster board and fold over one inch on each end to glue it to the body of the mug
  5. Hot glue the felt around the top of the mug unevenly and haphazardly so it looks like hot chocolate is spilling over the top of the mug
  6. Glue the foam as “marshmallows” on top of the felt
  7. Glue the elastic to the front and back of the mug as straps
diy halloween costume ideas
Source: Paige Cody via Unsplash

Costume idea #4: A Mario Kart family

Some easy and fun family costumes are Mario Kart cars! Pick your characters, then find some boxes, spray paint, vinyl, and ribbon. The cardboard boxes should be large enough to stand in, and you’ll also need:

  • Cardboard scissors
  • Spray paint (the colours will depend on what character you are recreating)
  • Hot glue and hot glue gun
  • Mario Kart car emblems (drawn or printed)
  • Permanent adhesive vinyl in colours that match your character
  • Ribbon
  • Painter’s tape

Step-by-step directions

  1. Measure how tall you want the base of the car to be and cut three of the four sides of your box off, leaving five inches of the base around the box and one full side of the box.
  2. Cut off the bottom of the box for your legs, then fold the front of the box back at a 45-degree angle. You can use the cardboard that you cut off for the tires.
  3. Paint your “car”, but tape off where you want the white stripes on the front to be; painting them white makes them your racing stripes!
  4. Cut out the Mario Kart symbols for your character and use hot glue to put them on the bonnet and sides of your car.
  5. Glue the tires to the side with the larger tires on the back and smaller tires on the front
  6. Create some straps to hold the car onto the wearer like suspenders.

Costume idea #5: Crayon on strike

Simple and cute, this costume takes inspiration from the book The Day The Crayons Quit. Make some crayon tip hats out of cardstock with a matching outfit in the colour you want your crayon to be. 

Add little black cuffs around the ankles and small protest signs that say “we quit” and “on strike” to the story! Be sure to write your protest messages with a box of crayons.

Costume idea #6: Cardboard flower pot

We’ll end with a very easy DIY project for those who need a last-minute Halloween costume. You’ll only need a big piece of cardboard and an X-Acto knife or scissors that can make some small cuts. This can also be great for DIY baby Halloween costumes!

Simply cut the shape of a flowerpot and paint around the edges to create the pot look, then cut the individual flowers and glue them on to create your own look.

You can even leave a few non-glued flowers that can be stuck on with blu-tack or held to change the “flowerpot arrangement” throughout the night. Maybe even give some flowers to the houses that reward you with the best candy for your efforts!

diy halloween costumes for kids
Source: Paige Cody via Unsplash

Frequently asked questions

How can I dress up for Halloween without a costume?

For those who don’t have the time or energy to come up with a costume, you can still get into the Halloween spirit with these ideas:

  1. Let a favourite character inspire your outfit
  2. Wear a festive headband
  3. Add a pop of orange to your outfit to pay homage to the pumpkin!
  4. Wear a DIY Halloween statement
  5. Rock a pumpkin t-shirt
  6. Opt for Halloween-style nail art
  7. Go for some bold lipstick or eyeliner

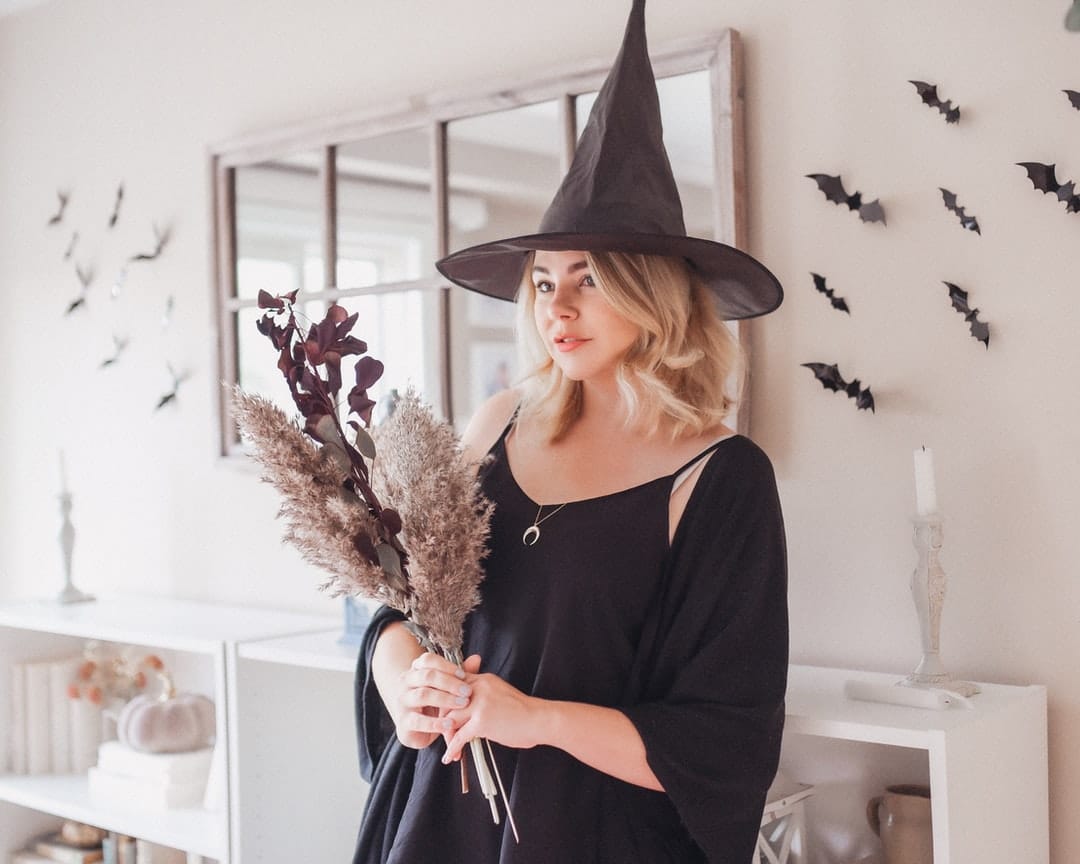
What are some classic Halloween costumes?

The classic Halloween costumes below may help you find the perfect traditional look for your next round of trick-or-treating:

  • Witch costumes
  • A vintage Pierrot Clown
  • Funny DIY Halloween costumes like an adult Tamagotchi
  • Pirate costumes (with a skeleton flag, of course)
  • Vampires
  • Animals
  • Devil (complete with pitchforks)
  • Zombie costumes

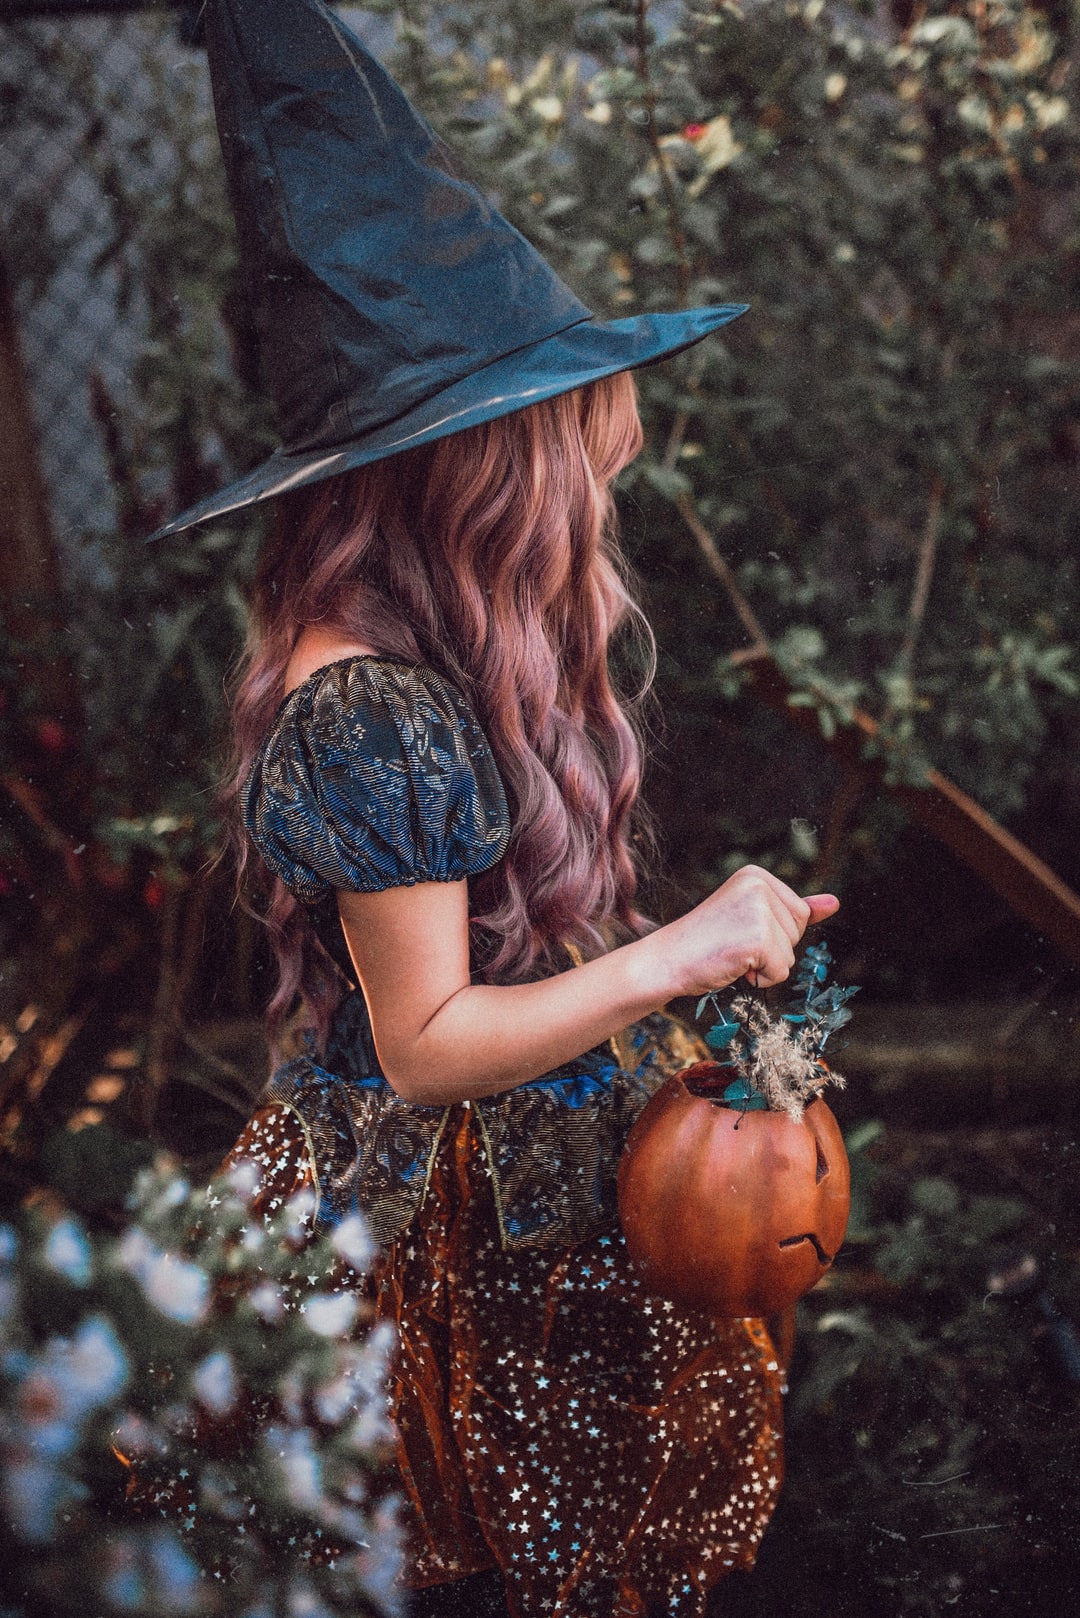
What is the most popular Halloween costume ever?

The most popular Halloween costume is often a witch that sees roughly 4.6 million people wearing the look each Halloween. Next on the list? Princess costumes and superheroes like Spiderman!

Look your best with these DIY Halloween costume ideas and have the spookiest night ever!

We’ve given you a bunch of fun options above to help you be creative and have fun next Halloween. Remember, you can tweak as necessary or take some of the core ideas to make new ones of your own!

If you really want to be flashy next Halloween (and possibly win some costume competition), search the very talented seamstress and costume maker Taskers we have available. They can help you go all out with a costume that will help your impress the neighbourhood and fill those bags with candy!

We know that people like to go all out with Halloween making it a contender for the best-looking event of the year. Hopefully, the ideas above help you truly get into the spirit!

Flat pack hacks: 10 ways to transform your furniture

Spruce up your IKEA stash.

Flat pack hacks: 10 ways to transform your furniture

Now, we’re not denying our love for flat pack. From bedside tables to cupboards and cabinets, this cheap and space-conscious invention has pretty much transformed our furniture buying habits. And it isn’t too difficult if you’re good with instructions and an Allen key.

But have you ever wondered how to make your flat pack furniture look, well, a little less flat?

Read on for 10 ways to up-cycle, paint and rearrange your way to new (and hopefully more exciting) furniture pieces.

1. Add some colour

The first (and probably most obvious) way to transform furniture is by adding colour. Most flat pack pieces come in their bare wooden state, so painting or staining can give them an instantly refreshed look.

You could also cover them with your favourite fabric print – just find a friend confident with a staple gun.

flat pack assemblers in Brighton

Source: Pinterest – hearthomemag.co.uk

2. Personalise by decorating surfaces

To add a little personal touch, get artsy. Stencils can actually work really nicely on top of a painted surface.

Don’t dive into a complicated design though – start with simple shapes for a chic and modern look.

3. Mirrors

Mirrors are pretty much the easiest way to add some ‘space’ to a room with actually adding any space. Put a mirror up on your flat pack closet doors to open up a room.

Need a hand with furniture assembly in Brighton? Find help on Airtasker.
flat pack assemblers in Brighton
Source: Pinterest – bedroom.about.com

4. Wallpaper

Peel on wallpaper is a fun and easy way to add colour and inject some life into a tired looking piece of furniture. And hey, you’re not committing to any permanent changes with it.

5. Quirky door knobs

Anything with a door knob can be quickly and easily transformed into something a little cuter.

If you’re struggling with the actual putting together of furniture part, try not to despair. There are plenty of people who are skilled at furniture assembly in Brighton.

6. Turn it upside down

Yep, it could just be as simple as turning it over. For instance, if you have a skinny bookcase you can turn it on its side to transform into a bench or a display shelf.

Try a few different positions to see what else you can use your pieces for – the possibilities are pretty much endless.

7. Combine with other pieces

Do you have a desk that needs additional storage space? A bed that needs a frame? Combine a couple of flat pack pieces together to create something multi-functional.

8. Use for something unexpected

You don’t necessarily have to use the furniture piece for what it was designed for. Reinvent it completely by using it for a completely different purpose.

9. Disassemble and reconstruct

Take something apart and then think of ways that you could put it back together into something new.  Think of your flat pack pieces as construction materials and rebuild them into something you need.

For example, a shelving unit could be disassembled and turned into a coffee table. Or a bookcase could turn into a tabletop.

Get creative and don’t be afraid to experiment.

10. Add more high-quality elements

Finally, who’s to say that your flat pack furniture needs to be assembled only using the pieces it came with?

Add in legs/handles/panels that are a little more flash and unusual to hack your way to a more interesting furniture piece.

Be warned though – this can get pretty addictive.

If you’d like to know how much does furniture restoration cost, visit our updated furniture restoration cost guide.

Find local and trusted flat pack assemblers in Brighton with Airtasker.

How to make and style your own balcony bar

Turn your outdoor space into a comfy chill zone.

How to make and style your own balcony bar

For all you city dwellers confused about what to do with your tiny flat balcony, consider building a balcony bar. Whether you have great views or not, it can help you make the most of your (no matter how minimal) outdoor space.

Why? Well it’s somewhere to sit on a balmy summer’s eve and enjoy a drink, or even dinner. And how great would it be to brunch al fresco on a lazy Sunday morning, in your pyjamas?

(No, building a balcony bar is not as complicated as it sounds. And hey, if you need an extra hand, there are plenty of handyman services in Brighton.)

How to make a balcony bar

handymen in Brighton

Source: Pinterest – balkon.bar

Begin by creating your counter top with slabs of wood

Start with gathering some slabs of wood and screw together to form a counter top.

Make sure you add a little lip at the top to protect anything you place on it.

Next, sand down the wood

So far, so good?

Stain or paint with your colour of preference

A light colour gives a more natural look, and a bright colour can add a touch of summer vibrancy (that you might just need as we approach the winter months!).

Keep it simple though, as anything too bold may clash with any styling you choose for the rest of your balcony space.

Add a top coat to weatherproof

Since your balcony bar is going to be exposed to the elements, add a clear top coat designed for the outdoors to keep it protected.

Construct brackets to hook onto balcony railing

Finally, construct the brackets which you’ll need to hook your bar onto your balcony railing. Remember, your counter top can easily be removed as and when you need more space.

All done! Finish off with some bar stools and you’re set to dine al fresco whenever you fancy it.

Not sure you can handle it? Reach out to handyman services in Brighton for help.

Style:

Outdoor textiles and rugs

It’s time to cosy up the joint. To make your balcony space a little homelier, don’t hold back on piling on the textiles. By layering elements such as rugs and plush cushions, you’ll be more inclined to spend your time there.

Fairy lights

To add some ambience in the evening, fairy lights always work well at emitting a warm glow. Sure, you can light up some candles when you’re dining but a little breeze could blow them out with ease.

They’re much loved for a reason! Go for solar string lights for an eco-friendly option.

Add some green

handymen in Brighton

Source: Pinterest – homefulies.com

Add a little plant action into the mix. Hanging plants are a great choice for balconies.

Not only does the green look great, but you can also plant a mini herb garden to get some fresh ingredients without leaving your abode.

Or, you could even learn how to grow a full-blown balcony vegetable garden.

Need a little help with your balcony bar? Find trusted and local handymen in Brighton with Airtasker.

5 hacks for DIY creative carpentry

Transform a bit of wood into something cute and quirky. Go on.

5 hacks for DIY creative carpentry

Just hearing the word ‘carpentry’ can be enough to intimidate even the most enthusiastic DIY-er.

But carpentry doesn’t always have to involve a hugely complicated undertaking. There are plenty of easier pieces you can start with to test your DIY skills. With a little bit of creativity, you can hack your way to some fairly impressive carpentry projects.

Give the below ideas a go and prepare to feel seriously proud, whether you do it by yourself or with a helping hand from carpentry services in Brighton.

Garden bench

A few beams of timber and some concrete blocks are all you need to put together a cute garden bench. This is the perfect DIY project for carpentry newbies to start with.

Simply slot the timber beams into the concrete block cavities. Once slotted in, cut them to the right length.

You can even widen your structure and make yourself an outdoor daybed by using more beams.

Style with cushions and throws to create a cosy outdoor space.

trusted carpenters in Brighton

Source: Pinterest – homeli.com

Quirky shelves

When it comes to shelving, you can get pretty artistic with a few slabs of wood and a bit of browsing time on Pinterest.

Shelving doesn’t have to be purely for storage. If it’s creatively put together, it can even serve as the primary decor piece in a room.

For instance, check out these shelves made of a pair of old crutches. In the world of DIY shelving, anything is possible.

trusted carpenters in Brighton

Source: Pinterest – recyclart.org

Pallet wine rack

Ah, pallets. They’re so easy to upcycle into something fun and functional. And you can paint them/stencil them/draw on them to make them truly unique to your home.

Build yourself (or a friend) a wine rack using some old unused wooden pallets which you probably already have lying around somewhere. It really only requires basic carpentry knowledge and a few tools.

Need a little help? Connect with carpentry services in Brighton on Airtasker.

trusted carpenters in Brighton

Source: Pinterest – woodpalletsfurniture.com

Whiskey barrel coffee table

Got an old whiskey barrel? If so, you can transform it into a cool and quirky coffee table that will definitely make a good conversation starter.

And the best part? It also doubles up as a storage unit. You can store some stuff or stash some drinks into the barrel of your table or neatly tuck any clutter away out of sight.

Don’t despair if you don’t have a spare whiskey barrel lying around at home – you should be able to find an old one to buy online on Ebay or from your nearest whiskey store for a small price.

trusted carpenters in Brighton

Source: Pinterest – bestpickr.com

Pallet art

Yep, pallets again. You can also use old pallets to create pieces of wood wall art for your home.

The great thing about using pallets for art is you get many attempts to perfect your work. If you mess up, you can just replace the pallet in question without having to start the whole piece all over again.

Wooden pallet art can make a great gift idea as each piece is completely unique.

trusted carpenters in Brighton

Source: Pinterest – blog.oakfurnitureland.co.uk

Need carpentry services? Find local and trusted carpenters in Brighton.

Tips to feel at home in student accommodation

Easy ways to love where you live.

Tips to feel at home in student accommodation

Chances are your uni halls or student house will be somewhere between ‘a bit basic’ and ‘what’s that smell?’.  If things switch on and off when they’re supposed to, a lack of loveliness isn’t a deal breaker – yet you don’t need tons of cash or creativity to feel at home.

There are limits to what you’re allowed to do to student accommodation, so keep it simple. Think clean, clear and colourful, and you’ll be cosy in no time.

Need help bringing your DIY-design dreams to life? Find trusted and local handymen on Airtasker.

1. Avoid clutter

Treat packing for uni like applying fake tan: it’s easier to top up than deal with the excess. That doesn’t mean going fully minimalist – just pack with transport and storage in mind.

  • Plastic crates with lids are great for moving day, and double as storage if you’re short of drawers or shelves
  • Check what’s included in the rent: you may not need to buy a desk lamp, cutlery or other basics.
  • Sharing? Try to co-ordinate who brings common gadgets. No house needs more than one kettle (and your electricity bill will thank you).

2. Keep it clean

Keeping stuff spotless means fewer smells, slugs, bugs or mice. It’s also far nicer for studying, sleeping or having mates round.

This is where those plastic crates are twice as nice: if don’t do your dishes or hang clothes up straight away, stick them in a box and pop the lid on until you’re ready to deal with them. Keeping your mess contained goes a long way to defusing arguments with flatmates, too …

3. Grow pleasing things

Fruit, veg and flowers can thrive in almost any kind of container, from boots to birdcages. You can grow lots of plants from seed for pennies, they brighten the place, plus you can munch the edible stuff later on. If you’ve ever binned uneaten salad, or don’t want to pay supermarket prices for fresh veg, make-do gardening is worth a go!

4. Get hands-on

Before buying brand new, check gumtree, freecycle and local noticeboards to find furniture and furnishings for free, cheap or swaps. Even a quick scrub and polish can get these into decent condition, though you can go as far as you like. Selling rescued furniture when you move (or as a side business) can bring in a bit of profit, too.

Alternatively, have a wander through YouTube, Instagram and Pinterest for arts, crafts and life hacks. It’s hard to feel like it’s a chore when you’re making your own candles or turning plastic cups into phone speakers.

5. If it’s your fault, fix it

Most things that go wrong in a student house are likely to come under the landlord’s watch – so make sure they stick to the bargain.

However, if you break, smash or scratch your landlord’s gear take action early (or you could end up with a dent in your deposit instead):

  • A small tester pot of paint can cover up minor wall issues – but only if you know the exact shade to use
  • Plaster filler can fix damage from nails and pins, but it’s best to avoid the issue altogether: check what kind of fixings are allowed and, if in doubt, stick with a pin board
  • Don’t just replace furniture or fittings and hope your landlord doesn’t clock it. Flag it up and agree what you’ll take care of.

Giving your rented accommodation some TLC doesn’t make for a nicer home – it makes it more likely you’ll get your deposit back in full, plus it shows you’re a keeper when it’s time to renew the lease.

9 DIY Instagram accounts you should be following

For some seriously drool-worthy inspiration.

9 DIY Instagram accounts you should be following

Home renovation and DIY inspiration is everywhere on Instagram.

If you’re about embark on some DIY work of your own, it’s easy to get overwhelmed with the amount of envy inducing craft skills and home transformations on display.

Keep your feed stream lined by following a more curated selection. Here are the 9 DIY accounts you need in your life for a daily dose of inspo:

1. PSimadethis

Started in 2009 by DIY queen Erica Domesek, this popular lifestyle brand covers everything from fashion to beauty to home decor.

From the looks of it, Erica knows how to make pretty much anything by hand. And she even sells DIY kits if you don’t feel like foraging for supplies.

handymanservices in London

2. The House that Lars Built

Designer Brittany Jepsen curates this fun feed full of cute craft ideas and lots of bright colours.

Prepare to get the urge to turn seriously artsy.

handyman services in London

3. Sugar & Cloth

Packed with DIY tutorials, and design and decor suggestions, Ashley Rose’s Sugar & Cloth Instagram account will keep your feed full of gorgeous shots. She also has a blog with lots of great DIY help and content.

Oh, and the pics of her super cute baby don’t hurt.

handyman services in London

4. Elsie + Emma A Beautiful Mess

If you’re looking for DIY inspiration to cover any budget, check out this account started by sisters Elsie and Emma.

This is one you could easily spend a long and lazy afternoon perusing through.

Screenshot ideas you love as you scroll, and find DIY help to bring them to life.

handyman services in London

5. Emily Henderson

Emily Henderson has a long and impressive list of stylish credentials, and you can see why with just one look at this stream of gorgeous interior design focussed content.

You should be able to find enough inspo here to want to renovate every room of your house.

handyman services in London

6. Kelly Mindell

Covering everything from quirky crafts to stunning home renovations, Kelly Mindell’s Insta account will add a dose of fun to your daily feed.

handyman services in London

7. Jenni Radosevich

If you’re currently renovating your home (or considering it), look no further for some seriously stylish DIY inspiration.

Jenni Radosevich’s Instagram stories are great for easy to follow DIY tutorials, and you’re pretty much guaranteed to fall in love with every nook and cranny of her home.

handyman services in London

8. Kate Watson-Smyth

Kate Watson-Smyth is one of the most influential figures in the UK interior decor scene. Soak up some of her fabulous sense of design by following this account and checking out her regularly updated blog.

There’s a fairly massive archive of DIY content and home decor news to keep you occupied and inspired.

handyman services in London

9. Helen Powell

Lovers of simple and chic decor, take note. Helen Powell AKA the Design Hunter has all the minimalist inspiration you need to transform your home into a stylish Scandi nirvana of your very own.

It’s calming to even just scroll through.

handyman services in London

Need some help with your next DIY project? Connect with trusted and local handymen with Airtasker.

How to lay wood flooring

Yep, you can lay your own flooring too. Here's how.

How to lay wood flooring

There’s really nothing like a solid wood floor.

It’s a classic feature for your home and one that lasts the test of time.

Sure, there are plenty of experienced people offering carpentry services in London, but have you ever considered laying the wood flooring at your home yourself? It’s entirely possible.

wood flooring well lit living room

A couple of things before you get started…

  • Wear knee pads to take some of that strain off.
  • Wear ear defenders when you’re using power tools – your ears will thank you later.
  • A dust mask and safety goggles are required for the board-cutting part.
  • Oh and if you’re cutting indoors, make sure you choose a well-ventilated room.
  • Patience and planning – don’t rush this process!

Here’s a guide to give you an idea of the steps involved in laying wood flooring at home. Turn to carpentry services in London if you need any expert assistance. To add, if you’d like to know how much it costs to clean floors, visit our updated floor cleaning cost guide.

Pick your choice of wood

A good place to start (and maybe the most fun step). Pick the type of wood flooring you want.  Most of the popular options are fairly low maintenance, such as oak, pine, cherry and walnut.

Pick your favourite hue and you’re all set to get started.

Check your base is in good shape

The base (AKA sub-floor) is the layer of flooring which will lie underneath your brand spanking new wood floor. You need a solid base so your flooring can get the support it needs to endure the inevitable stress of daily use.

Check that your sub-floor isn’t worn or uneven in any areas. It needs to be even, dry and smooth.  If it does have any faults, get them replaced or fixed before you continue layering your wooden flooring on top.

Remember, a faulty base leads to problems in the future.

Remove all obstacles

This includes removing the trim or base moulding around the room’s perimeter. Use a putty knife to pry these away without causing any damage to the trim.

Let the wood acclimatise

A hugely important step of the process that will require a bit of patience. At least 7 days, to be exact.

As moisture in the air can cause your wooden flooring to expand, you need to expose your floor boards to the new room’s atmosphere for a week so they can acclimatise properly before securing. It takes this time to adjust to the change in temperature.

Your floor manufacturer will have specific instructions on whether the flooring should be left to acclimatise in the packaging or not. Some may need less time, so opt for those if you need your floor done in a jiffy.

Check your placements

‘Dry lay’ your flooring to find the best positions for your floorboards before nailing them down.

It’s easy – lay the first few boards in your ideal locations and check that the placement works.

Use a pencil to mark where the joists under the floor lie. Laying your floorboards perpendicular to the joists is considered best practice.

Start to lay your floorboards

Now that you have your placements sorted, you’re ready to lay your first board (finally).

Lay your boards on top of a vapour barrier sheet to keep noise levels in your home down.

Keep your first board about a centimetre away from your wall to allow for any slight expansion.

Fasten your floorboards

You can blind nail or face nail your floorboards to secure them to the ground. Blind nailing involves driving a nail into the board’s tongue at an angle using a flooring nailer. The nailer is a godsend for you (and your neighbours) as it saves you hammering away.

Face nailing is also straightforward. It involves driving a nail into a pre-drilled hole. You can use a power nailer for this too.

Nail away until all the floorboards are secure.

Step back and enjoy the vision of your newly laid wood floor.

Yep, you did that.

When to call a carpenter

Not to doubt your abilities or anything, but there are some instances where only professional carpentry services will do. Call a carpenter if:

  • Your sub-floor is in a bad state. Remember, a faulty base will lead to trouble in the future.
  • If you’re worried about safety while laying your wood flooring.
  • If you want the best possible finish for your floor. An expert hand pretty much guarantees it.

Need some assistance in laying your wood flooring? Find trusted carpenters with Airtasker.

5 ways to make the most of creative carpentry

There's a lot you can do with a few slabs of wood and some creative juices.

5 ways to make the most of creative carpentry

Carpentry doesn’t have to be all that complicated.

Well, it can be.

But once you’ve attempted a couple of these carpentry projects, you’ll find yourself becoming more capable and more confident with your DIY abilities.

You can find plenty of creative ways to wow your house guests by working a few slabs of wood into something special. Try the below ideas, either by yourself or with a little help from one of the many skilled carpentry services in London.

1. Pergolas

Building yourself one of these could result in some serious DIY pride. Pergolas can add instant impact to any outdoor space, and can be sized based on preference and space.

You could use it to shade an outdoor seating area – having an al fresco dining area is one of the top gardening trends of 2018.

A word of caution though. Your pergola should be super sturdy if you’ll have anyone sitting under it. Get professional carpentry services to help make sure it’s secure.

Pergolas are also great for trailing plants like wisteria. Pretty + extra shade.

carpenters in London

Source: Pinterest – thatsmyletter.blogspot.com

If you’re keen to know how much does a pergola cost, check out our updated pergola price guide.

2. Wooden bar (on wheels)

Yep, the wheels part is important. It means you can use your bar no matter what this British weather throws at us.

Perks of building your own bar:

  • Your favourite drink is (usually) in stock.
  • You’ll always get a seat.
  • No bathroom queues.
  • A substantial rise in popularity.

carpenters in London

Source: Pinterest – thatsmyletter.blogspot.com

3. Quirky shelving units

Shelving doesn’t have to be boring or ‘standard’. Done right, a shelf could serve as wall art or the main feature piece in a room.

With a bit of creativity (and perhaps a tiny bit of carpentry help) you can put together a shelf that is fun + functional. Pretty much anything can be transformed into a shelf of some shape or size. Let your imagination run wild.

Up your shelving game by Pinterest-ing the below ideas:

  • Honeycomb shelves
  • Hanging shelves
  • Guitar shelves
  • Ladder shelves

carpenters in London

Source: Pinterest – thatsmyletter.blogspot.com

4. Garden pallet furniture

Up-cycling is a trend that isn’t going away any time soon. Breathe some new life into wooden pallets by transforming them into unique garden furniture pieces.

At least you know it’ll be totally one of a kind. And you can’t really beat the value factor.

Pallets are fairly simple to work with. So if you’re a carpentry newbie, this may be a good one to start with. They’re also easy to paint or stain if you want to add a pop of colour to your outdoor space.

Add large cushions and thick throws onto pallet benches for an instant ‘snug’ corner in your garden.

carpenters in London

Source: Pinterest – boromir.info

5. Fire pit

It’s going to get pretty chilly pretty fast.

If you want to continue enjoying your outdoor time at time, you could try building a DIY fire pit.

Again, this one’s sure to be a crowd pleaser. Whether you’re toasting marshmallows with the fam or just want to utilise your outdoor space for an evening gathering, try to put one together using the steps in the image below.

carpenters in London

Source: Pinterest – meirious.epizy.com

Need a little help with your next project? Find trusted and local carpenters on Airtasker.

IKEA furniture assembly tips

Want to conquer assembling Ikea furniture? Read on for some tips to help you do just that.

IKEA furniture assembly tips

Shopping for furniture is the fun part, but when it comes to furniture assembly, people can fall into four categories:

1. People that hate anything that comes in a flat pack.
2. Those who enjoy trying to use the instructions to successfully put furniture together.
3. People that realise it has to be done sooner or later and dig in.
4. People who choose to outsource furniture assembly.

Whether you attempt to tackle the flat pack or outsource it, here are 8 essential tips for successful furniture assembly:

Prepare

• Make sure you have enough space in the room and clear away things that can be easily knocked over.
• If you’re working on a floor that may get damaged, put a towel or old bed sheets down to protect it.
• Find something to put all the screws and bolts into.
• Lay out all of the pieces according to size and shape.

Follow the instructions

flat-pack-furniture-instructions
Source: Wartime Housewife

When following the steps, it’s important not to jump ahead or take shortcuts. There’s a reason that the instructions are laid out in a specific order, so try and stay in sequence.

Get the right tools

There are two types of tool that you will need – specialist tools that are supplied with the furniture (e.g. allen keys), and your own standard tools such as screwdrivers. Remember:

• Don’t lose the specialist tools to save yourself repeat visits to the supplier.
• Make sure you use proper standard tools, i.e. a bread knife is not a substitute for a screwdriver. Find a local handyman to help source tools if needed.

furniture assembly tools
Source: See the woods and the trees

Leave yourself enough time

When estimating how long it will take you to build a piece of flat pack furniture, remember that it will always take you longer than you think. Even for small items, set a realistic time frame. If you’re building something large, set aside several hours to focus on it.

Proper tightening

The key to successful furniture assembly often comes down to tightening. To make sure you’ve done this correctly, make sure you:

1. Put all of the screws in place before fully tightening.
2. Do not over tighten. In fact you can often damage the boards if you over tighten too much.

Find a friend or handyman to save time

If you go solo:
1. It will take you longer
2. Less likely to make mistakes
3. Less arguments

If you get some help:
1. Bigger pieces can be put together easier
2. Less physical input demanded
3. Safer

Take it one step at a time

The first rule of furniture assembly is: never start a new piece of flat pack furniture until you’ve fully completed the first piece you started.

Why? Because more likely than not, you’ll mix up the pieces and parts if you try more than one at a time.

Revisit your handiwork

The final IKEA furniture assembly tip is to go back to the item after 3-4 days of use. Check all of the screws and fittings. Tighten any that are loose and make sure everything is working properly.

Still find yourself struggling with furniture assembly? Airtasker can connect you to plenty of helpful handyman services in London.

15 ideas with pallet furniture

Seats, tables, beds, and more. Here are 15 ways to turn recycled pallets into cool and quirky furniture pieces.

15 ideas with pallet furniture

Traditionally used in shipping and airfreight, creative DIYers have long been turning pallets into furniture for homes, restaurants and offices.

In addition to looking cool, pallets are cheap and easy to get. With a bit of know-how (or handyman services), they can be transformed into almost any piece of furniture.

Here are 15 great ways to add pallet furniture to your home:

1. Pallet Bar

Use pallets to create fantastic alternatives to the traditional expensive bar tables at home.

2. Wedding Decoration DIY

Thanks to websites such as Etsy and Pinterest, many brides are finding inspiration for personalised DIY for their special day. Pallets can be turned into backdrops, signs, bars, seating and decoration. Here are a couple of examples:

Wedding decoration
Source: Brazos Valley Bride

3. Bookshelf

Use pallets to make a shelving unit. This can be a great way to organise books, display ornaments, and store your favourite crockery.

pallet-bookcase
Source: Pallet Furniture Ideas

4. Coffee Table

If you’re a first timer with pallets, perhaps the easiest project to start with is making a coffee table.

Unique-Coffee-Pallet-Table
Source: Decorate Idea

5. Storage Chest

Create a pallet storage chest in any size you need for toys, winter throws, or anything else you want tucked out of sight.

pallet-storage-chest
Source: Tree Hugger

6. Children’s Furniture

You don’t need to spend a lot on children’s furniture which won’t be used for long. With some pallets and bright paint, you can easily create fun furniture for your children’s room.

diy-pallet-kid-furniture
Source: Resourcedir

7. Plant Boxes

Whether it’s a huge pallet vertical garden wall or a simple plant box, this is the perfect DIY project to start with.

8. Stairs

This is a much more ambitious project, and you’d need an architect and professional handyman to look over and help design it. But it’s sure to make your home stand out.

9. Outdoor Seating

Pallets are commonly used to make outdoor furniture. You can create your bespoke garden furniture to suit your outdoor space and dress it up in a variety of colours.

pallet-furniture-ideas
Source: Kung Fu Homes

10. Wine Rack

No need to hide your wine collection when you can display it in a simple and elegant way using pallets.

pallet-wine-rack
Source: Homes Kid

11. TV Unit

You could build a TV unit with storage using pallets.

pallet-tv-unit
Source: Wookmark

12. Chandelier

How about a light fixture like this chandelier? You could swap out the candles and replace with fairy lights for a pretty outdoor ambience.

13. Office Furniture

Add a bit of fun to a bland office space with a break-out room set-up, or even a quirky pallet boardroom table.

14. A Bed

A pallet bed isn’t too hard to assemble and gives you the chance to create lots of storage nooks underneath.

diy-pallet-bedroom-furniture-charming-design-8-on-bedroom-design-ideas
Source: Wpedia

15. Garden Path

Pallets look great in a garden path, such as this Asian inspired garden.

DIY-Walkway-Garden-Furniture-Ideas-For-DIY-Outdoor-Furniture-Gardening-Design
Source: Mariners View Apartments

Have you got any more DIY pallet furniture ideas? Let us know in the comments below – we’d love to hear them.

Don’t have time for a DIY project? Get some handyman help from an Airtasker in your area.