Essential carpentry tips for beginners

Woodwork wannabes, take note.

Essential carpentry tips for beginners

Considering a foray into woodworking? Curious about carpentry?

Let’s get real:

Carpentry is not easy. But, like any skill, it’s teachable. Pair a willingness to learn with consistent practice, and you might just find yourselves well-equipped to offer carpentry services to others one day.

In the meantime, here are some essential carpentry tips to get you started:

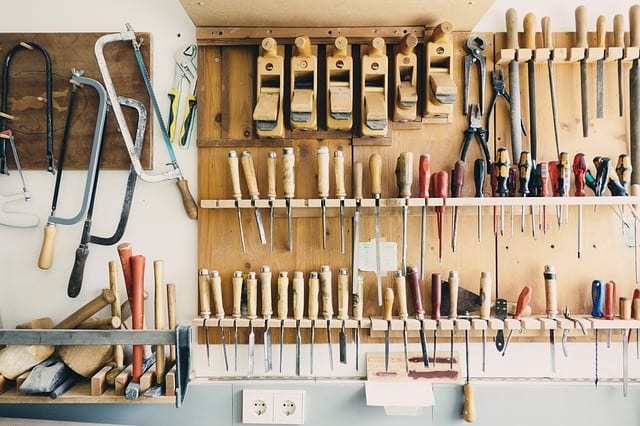
Start with a high-quality tool set

First things first, you need the right kit to get started.

Now, you really don’t need a huge amount to start with, but you should have a variety of versatile and high-quality tools. You can order a good starter tool kit with storage on Amazon. Otherwise, head to your favourite nearby DIY store and hunt down the most helpful member of staff.

Once you have your tools, learn how to keep them well. The way you store them can damage their edges, so make sure they’re positioned at a safe distance from each other. Oh, and store them in a dry location to avoid any rust.

carpentry services

Start small

Being ambitious isn’t necessarily a bad thing. Biting off more than you can chew can be.

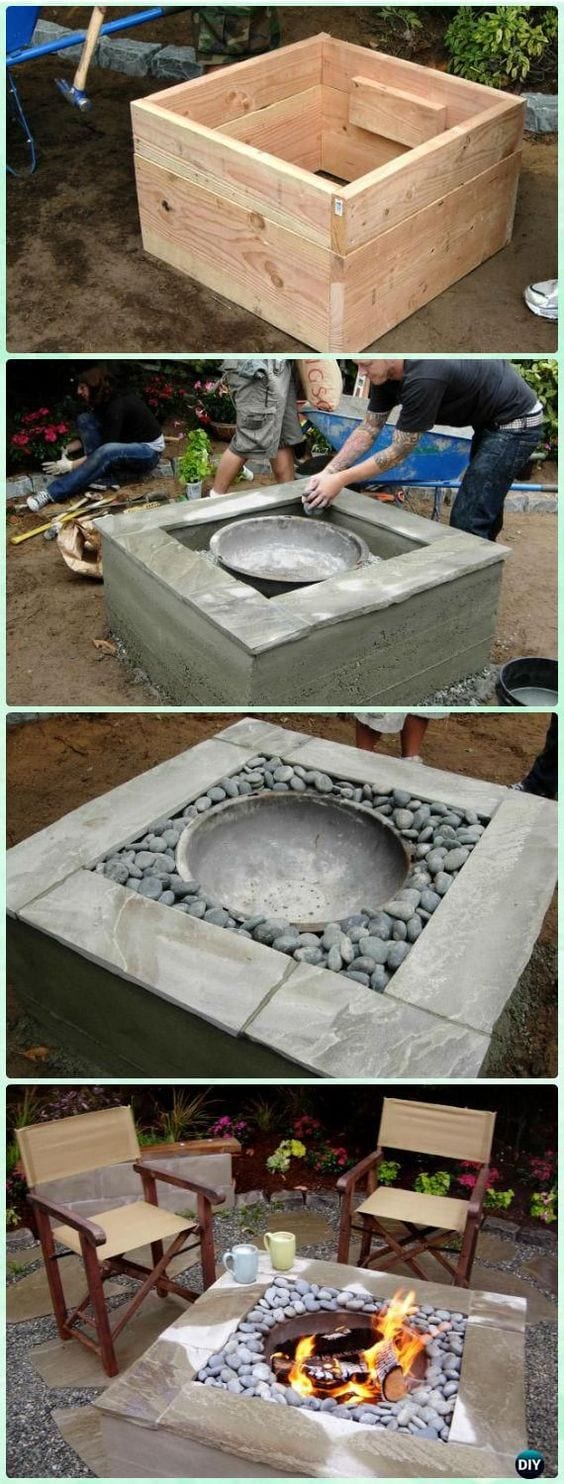
Don’t overwhelm yourself by starting a carpentry project where a beginner realistically won’t have much chance of success. Start with a simple and modest piece that won’t leave you frustrated and turned off at the start of your carpentry journey.

Build/buy a workbench you love

Every good carpenter needs a proper workbench to carry out their work. Now, you can always buy one, or you could build one and make that your very first carpentry project.

Place your workbench somewhere quiet and keep it clean.

Measure everything

This might sound like an obvious one, but you’d be surprised how badly just one incorrect measurement can impact an entire project.

Don’t just measure the materials you’re going to work with. Measure your workspace and the space where your work will be laid down.

Practice, practice, practice

Like everything, good creative carpentry takes practice. Expect it to take time and be slightly frustrating at the beginning. If you keep at it, you’ll find that it’s a skill that improves considerably with consistency and practice.

YouTube and Pinterest are both valuable resources for beginner carpenters. You can use them as a source of inspiration and learning, but don’t be afraid to get inventive and creative on your own.

Need help? Get help

Whether you’re a total newbie or not, no one is going to judge you for needing a little help from time to time. There are plenty of skilled individuals offering carpentry services who’d be happy to teach a beginner the ropes.

You can also turn to a professional when you find yourself getting overwhelmed with a project. Sometimes, an expert is necessary to finish off a big project and to ensure there are no health and safety risks.
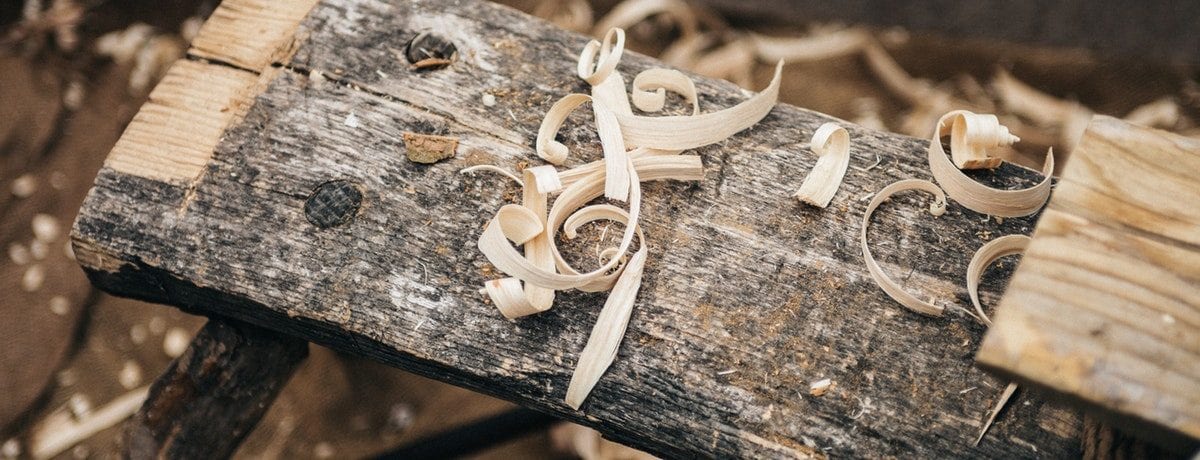
Sanding tips

A key step in preparing any wooden surfaces, learning how to sand correctly is likely to be one of the first things you learn:

  • Start with a coarse sandpaper, and finish with a finer one.
  • Make sure you’re sanding in the direction of grain rather than against it.
  • Check the quality of the sandpaper by folding it. If you spot grains falling, it’s not of a good enough quality to use.

Varnishing tips

  • Make sure you use the right brush to varnish your piece. For general varnishing, it should be as flat and large as possible.
  • If your wood has small details, a smaller brush is recommended.
  • Checking the porosity of the wood is also important to determine the right varnish and how many layers you’ll need to apply.
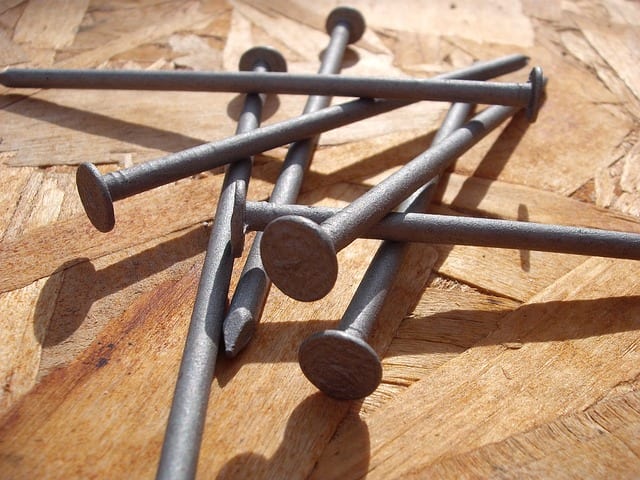
carpentry services

Hammering tips

It looks easy enough. But the simple act of hammering a nail can lead to many more accidents than you’d imagine.

  • If you’re hammering a large nail, use a comb with prongs to hold it still while nailing.
  • When the nail is on the smaller size, nail it in a small piece of cardboard first so it’s erect and you don’t need to risk your fingers in the process.

How to avoid splinters

  • Your tools need to be sharp and well-preserved.
  • Use a piece of wood to support the piece you’re working on.
  • Use the right saw for the type of wood you’re using – they don’t work equally on all types.

Need to find a carpenter? Connect with trusted carpenters on Airtasker.

5 hacks for DIY creative carpentry

Transform a bit of wood into something cute and quirky. Go on.

5 hacks for DIY creative carpentry

Just hearing the word ‘carpentry’ can be enough to intimidate even the most enthusiastic DIY-er.

But carpentry doesn’t always have to involve a hugely complicated undertaking. There are plenty of easier pieces you can start with to test your DIY skills. With a little bit of creativity, you can hack your way to some fairly impressive carpentry projects.

Give the below ideas a go and prepare to feel seriously proud, whether you do it by yourself or with a helping hand from carpentry services in Brighton.

Garden bench

A few beams of timber and some concrete blocks are all you need to put together a cute garden bench. This is the perfect DIY project for carpentry newbies to start with.

Simply slot the timber beams into the concrete block cavities. Once slotted in, cut them to the right length.

You can even widen your structure and make yourself an outdoor daybed by using more beams.

Style with cushions and throws to create a cosy outdoor space.

trusted carpenters in Brighton

Source: Pinterest – homeli.com

Quirky shelves

When it comes to shelving, you can get pretty artistic with a few slabs of wood and a bit of browsing time on Pinterest.

Shelving doesn’t have to be purely for storage. If it’s creatively put together, it can even serve as the primary decor piece in a room.

For instance, check out these shelves made of a pair of old crutches. In the world of DIY shelving, anything is possible.

trusted carpenters in Brighton

Source: Pinterest – recyclart.org

Pallet wine rack

Ah, pallets. They’re so easy to upcycle into something fun and functional. And you can paint them/stencil them/draw on them to make them truly unique to your home.

Build yourself (or a friend) a wine rack using some old unused wooden pallets which you probably already have lying around somewhere. It really only requires basic carpentry knowledge and a few tools.

Need a little help? Connect with carpentry services in Brighton on Airtasker.

trusted carpenters in Brighton

Source: Pinterest – woodpalletsfurniture.com

Whiskey barrel coffee table

Got an old whiskey barrel? If so, you can transform it into a cool and quirky coffee table that will definitely make a good conversation starter.

And the best part? It also doubles up as a storage unit. You can store some stuff or stash some drinks into the barrel of your table or neatly tuck any clutter away out of sight.

Don’t despair if you don’t have a spare whiskey barrel lying around at home – you should be able to find an old one to buy online on Ebay or from your nearest whiskey store for a small price.

trusted carpenters in Brighton

Source: Pinterest – bestpickr.com

Pallet art

Yep, pallets again. You can also use old pallets to create pieces of wood wall art for your home.

The great thing about using pallets for art is you get many attempts to perfect your work. If you mess up, you can just replace the pallet in question without having to start the whole piece all over again.

Wooden pallet art can make a great gift idea as each piece is completely unique.

trusted carpenters in Brighton

Source: Pinterest – blog.oakfurnitureland.co.uk

Need carpentry services? Find local and trusted carpenters in Brighton.

How to lay wood flooring

Yep, you can lay your own flooring too. Here's how.

How to lay wood flooring

There’s really nothing like a solid wood floor.

It’s a classic feature for your home and one that lasts the test of time.

Sure, there are plenty of experienced people offering carpentry services in London, but have you ever considered laying the wood flooring at your home yourself? It’s entirely possible.

wood flooring well lit living room

A couple of things before you get started…

  • Wear knee pads to take some of that strain off.
  • Wear ear defenders when you’re using power tools – your ears will thank you later.
  • A dust mask and safety goggles are required for the board-cutting part.
  • Oh and if you’re cutting indoors, make sure you choose a well-ventilated room.
  • Patience and planning – don’t rush this process!

Here’s a guide to give you an idea of the steps involved in laying wood flooring at home. Turn to carpentry services in London if you need any expert assistance. To add, if you’d like to know how much it costs to clean floors, visit our updated floor cleaning cost guide.

Pick your choice of wood

A good place to start (and maybe the most fun step). Pick the type of wood flooring you want.  Most of the popular options are fairly low maintenance, such as oak, pine, cherry and walnut.

Pick your favourite hue and you’re all set to get started.

Check your base is in good shape

The base (AKA sub-floor) is the layer of flooring which will lie underneath your brand spanking new wood floor. You need a solid base so your flooring can get the support it needs to endure the inevitable stress of daily use.

Check that your sub-floor isn’t worn or uneven in any areas. It needs to be even, dry and smooth.  If it does have any faults, get them replaced or fixed before you continue layering your wooden flooring on top.

Remember, a faulty base leads to problems in the future.

Remove all obstacles

This includes removing the trim or base moulding around the room’s perimeter. Use a putty knife to pry these away without causing any damage to the trim.

Let the wood acclimatise

A hugely important step of the process that will require a bit of patience. At least 7 days, to be exact.

As moisture in the air can cause your wooden flooring to expand, you need to expose your floor boards to the new room’s atmosphere for a week so they can acclimatise properly before securing. It takes this time to adjust to the change in temperature.

Your floor manufacturer will have specific instructions on whether the flooring should be left to acclimatise in the packaging or not. Some may need less time, so opt for those if you need your floor done in a jiffy.

Check your placements

‘Dry lay’ your flooring to find the best positions for your floorboards before nailing them down.

It’s easy – lay the first few boards in your ideal locations and check that the placement works.

Use a pencil to mark where the joists under the floor lie. Laying your floorboards perpendicular to the joists is considered best practice.

Start to lay your floorboards

Now that you have your placements sorted, you’re ready to lay your first board (finally).

Lay your boards on top of a vapour barrier sheet to keep noise levels in your home down.

Keep your first board about a centimetre away from your wall to allow for any slight expansion.

Fasten your floorboards

You can blind nail or face nail your floorboards to secure them to the ground. Blind nailing involves driving a nail into the board’s tongue at an angle using a flooring nailer. The nailer is a godsend for you (and your neighbours) as it saves you hammering away.

Face nailing is also straightforward. It involves driving a nail into a pre-drilled hole. You can use a power nailer for this too.

Nail away until all the floorboards are secure.

Step back and enjoy the vision of your newly laid wood floor.

Yep, you did that.

When to call a carpenter

Not to doubt your abilities or anything, but there are some instances where only professional carpentry services will do. Call a carpenter if:

  • Your sub-floor is in a bad state. Remember, a faulty base will lead to trouble in the future.
  • If you’re worried about safety while laying your wood flooring.
  • If you want the best possible finish for your floor. An expert hand pretty much guarantees it.

Need some assistance in laying your wood flooring? Find trusted carpenters with Airtasker.

5 ways to make the most of creative carpentry

There's a lot you can do with a few slabs of wood and some creative juices.

5 ways to make the most of creative carpentry

Carpentry doesn’t have to be all that complicated.

Well, it can be.

But once you’ve attempted a couple of these carpentry projects, you’ll find yourself becoming more capable and more confident with your DIY abilities.

You can find plenty of creative ways to wow your house guests by working a few slabs of wood into something special. Try the below ideas, either by yourself or with a little help from one of the many skilled carpentry services in London.

1. Pergolas

Building yourself one of these could result in some serious DIY pride. Pergolas can add instant impact to any outdoor space, and can be sized based on preference and space.

You could use it to shade an outdoor seating area – having an al fresco dining area is one of the top gardening trends of 2018.

A word of caution though. Your pergola should be super sturdy if you’ll have anyone sitting under it. Get professional carpentry services to help make sure it’s secure.

Pergolas are also great for trailing plants like wisteria. Pretty + extra shade.

carpenters in London

Source: Pinterest – thatsmyletter.blogspot.com

If you’re keen to know how much does a pergola cost, check out our updated pergola price guide.

2. Wooden bar (on wheels)

Yep, the wheels part is important. It means you can use your bar no matter what this British weather throws at us.

Perks of building your own bar:

  • Your favourite drink is (usually) in stock.
  • You’ll always get a seat.
  • No bathroom queues.
  • A substantial rise in popularity.

carpenters in London

Source: Pinterest – thatsmyletter.blogspot.com

3. Quirky shelving units

Shelving doesn’t have to be boring or ‘standard’. Done right, a shelf could serve as wall art or the main feature piece in a room.

With a bit of creativity (and perhaps a tiny bit of carpentry help) you can put together a shelf that is fun + functional. Pretty much anything can be transformed into a shelf of some shape or size. Let your imagination run wild.

Up your shelving game by Pinterest-ing the below ideas:

  • Honeycomb shelves
  • Hanging shelves
  • Guitar shelves
  • Ladder shelves

carpenters in London

Source: Pinterest – thatsmyletter.blogspot.com

4. Garden pallet furniture

Up-cycling is a trend that isn’t going away any time soon. Breathe some new life into wooden pallets by transforming them into unique garden furniture pieces.

At least you know it’ll be totally one of a kind. And you can’t really beat the value factor.

Pallets are fairly simple to work with. So if you’re a carpentry newbie, this may be a good one to start with. They’re also easy to paint or stain if you want to add a pop of colour to your outdoor space.

Add large cushions and thick throws onto pallet benches for an instant ‘snug’ corner in your garden.

carpenters in London

Source: Pinterest – boromir.info

5. Fire pit

It’s going to get pretty chilly pretty fast.

If you want to continue enjoying your outdoor time at time, you could try building a DIY fire pit.

Again, this one’s sure to be a crowd pleaser. Whether you’re toasting marshmallows with the fam or just want to utilise your outdoor space for an evening gathering, try to put one together using the steps in the image below.

carpenters in London

Source: Pinterest – meirious.epizy.com

Need a little help with your next project? Find trusted and local carpenters on Airtasker.