Find a professional kitchen sink installation service in Auckland
Fill in a short form and get free quotes for kitchen sink installation services in Auckland
Get help from a local kitchen sink installer
- Kitchen sink sprayer replacement
- Kitchen sink faucet replacement
- Kitchen sink spray head replacement
- Kitchen sink strainer replacement
- Kitchen sink drain install
- … or anything else
Recent Kitchen Sink Installation tasks in Auckland
Leak detection and fix at home. Leaking under kitchen sink as well
$100
Auckland AUK 1060, New Zealand
3rd Mar 2026
Leak detection check at home. Minor leak under kitchen sink to be looked at and fixed.
Kitchen sink grinder does not seem to be working, humming sound
$100
Takanini AUK, New Zealand
18th Jan 2026
Kitchen sink grinder, does not seem to be working on one sink, gives a low humming sound.
I want to fix water damage kitchen cupboard below the kitchen sink
$200
Balmoral AUK 1041, New Zealand
24th Jul 2025
Fix water damage kitchen cupboard below the kitchen sink.
Unblock my kitchen sink
$100
Glen Eden, Auckland, New Zealand
23rd May 2024
My kitchen sink is blocked .. have used plunger to clear but nothing work.
Installing a kitchen sink
$400
Avondale, Auckland, New Zealand
30th Nov 2022
to romove the old kitchen sink and install a new one - Due date: Flexible
What is Airtasker?

Post your task
Tell us what you need, it's FREE to post.

Review offers
Get offers from trusted Taskers and view profiles.

Get it done
Choose the right person for your task and get it done.
Related Services near me
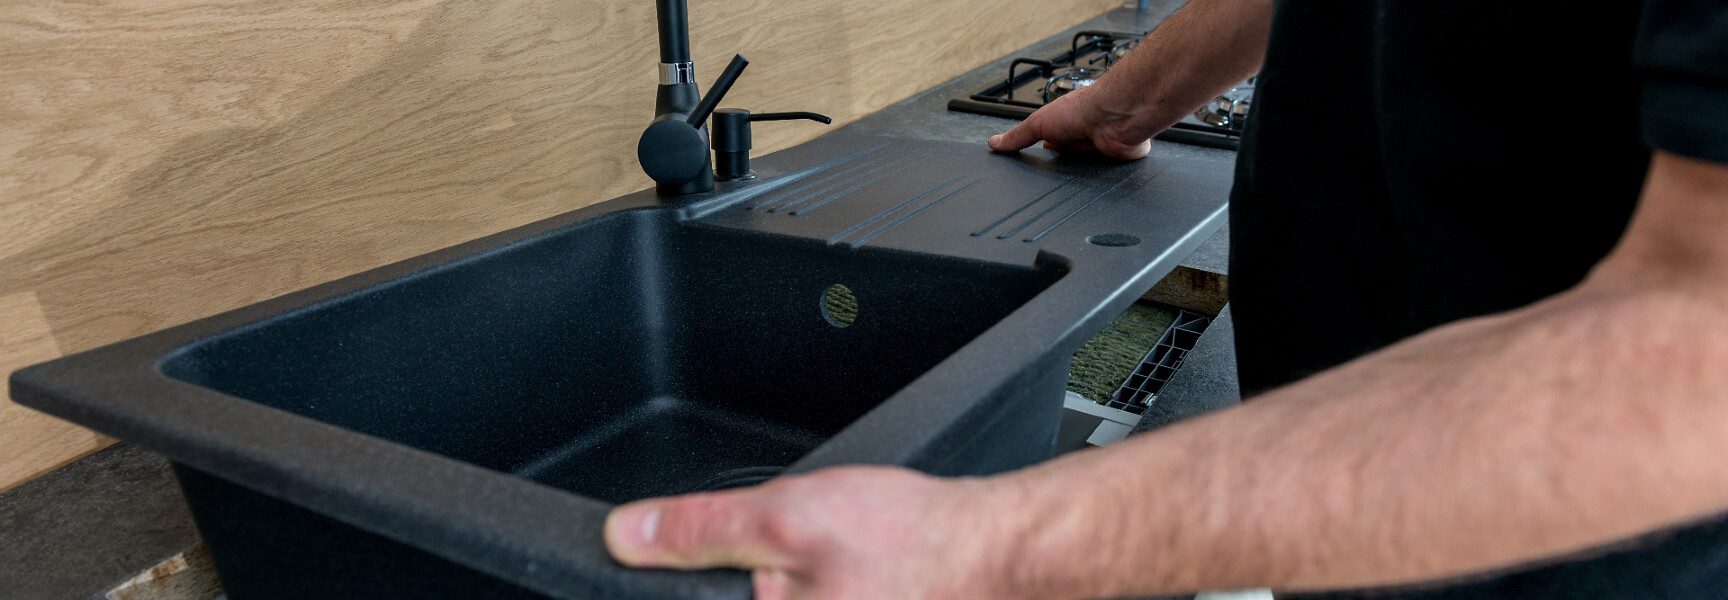
What does a kitchen sink installation service include?
Your kitchen sink installer will take care of everything, from helping you choose your sink and prepping the area to installing the sink, fitting the taps and pipes, and sealing the area. Plus, they’ll take care of kitchen sink removal (if needed) and handle any repairs.
Here’s what you can expect from a handyman offering kitchen sink installation in your area:
Step 1: Kitchen sink removal
If you’re upgrading and replacing your old sink, your installer will first remove it. They’ll switch off the water supply valves under the sink or the main supply. Next, they’ll switch on the tap to let out any water that’s already there. They’ll put buckets underneath the pipes, ready to catch any lingering water as they’re removed. The next step is to remove the water supply lines, along with the drainpipe, fittings, and dishwasher connection (if there is one). They’ll find the sink clips located underneath the outside edge of the sink and loosen them. Next, they’ll use a knife to cut away the caulk that attaches your sink to the benchtop before lifting your sink out.
Step 2: Prep
Taskers come with tools and materials, such as a utility knife, a plumber's putty, an adjustable wrench, or a silicone sealant. You can also prepare some of the materials if you have them on hand. With the sink removed, your contractor will clean the area, removing any extra silicone caulk from the benchtop and washing it with soapy water. They’ll wash and prepare any old parts you are reusing (like the drain or tap). Before installing, they’ll check your new sink and ensure it fits in the existing countertop hole. If not, they’ll either recommend choosing a different sink or increasing the hole size by cutting with a jigsaw until it fits.
Step 3: Kitchen sink installation
Installing your kitchen sink involves applying a silicone caulk to the sink’s underside before placing it into the hole. Next, they’ll wipe away any caulk that seeps out from under the edges before attaching the clips to the underneath of the sink, twisting them to secure the sink into place. Of course, this installation process only applies if your sink is top-mounted, so it will vary slightly for under-mounted sinks.
Step 4: Kitchen tap installation and reconnect pipes
To finish off, your kitchen tap is installed and the pipes are reconnected. Your installer will place your tap through the hole in your sink, using a washer and nut to hold the water lines in place before tightening. They’ll place the drain strainer and seal it in, removing excess putty before covering it with the rubber gasket and flange. Your contractor will connect each water supply line and re-connect the dishwasher and waste pipework, connecting all the pipes together again. Finally, they’ll switch the water supply back on, turn on the sink, test the water pressure, and make sure there are no leaks or possible water damage.