How to declutter your home before moving

Read this guide and you'll find the whole moving process will be faster, easier, and cheaper.

How to declutter your home before moving

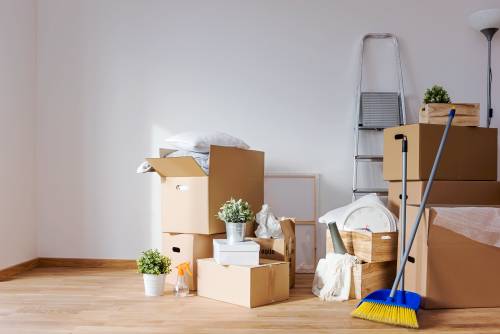
Let’s face it, not many of us are great with minimalism. Clutter seems to be attracted to us, and hoarding is more common than you think. That’s why moving house is the perfect time for a household purge. 

It forces you to go through all your possessions with a fine-tooth comb. You also have the big moving day deadline to work towards.

Keeping only the things you love and getting rid of those you no longer need help achieve a more streamlined life. 

It creates a home where you can find something more easily. You’ll also save time spent constantly tidying up piles of accumulated belongings.

An added bonus of decluttering your home right before moving is having fewer items to pack and transport. You’ll find the whole moving process will be faster, easier, and cheaper.
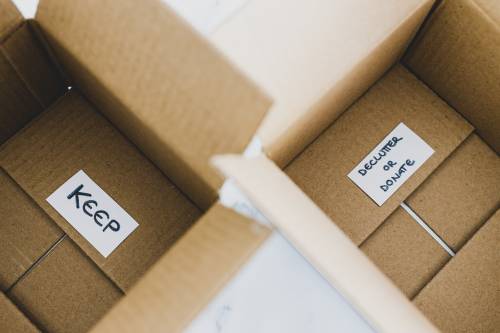
Keep, sell, throw

There are many tactics for a successful home purge. Some decluttering experts advocate the Four Box Method, where you go through each room in your home armed with separate boxes. One box is for things you want to keep, one to sell or give to charity, one to chuck, and one for items you’re still undecided about.

Others are devotees of the Japanese KonMari method, where you pick up each item you own and decide to keep it only if it “sparks joy” or if it is useful.

boxes for decluttering

There’s even “Swedish death cleaning”, a decluttering technique where you downsize your belongings in recognition of the stark fact that one day, you won’t be able to take anything with you and that your junk may just be a burden for your loved ones. But hey, if that’s too much for you, you might prefer to stick with the Four Box Method.

Whichever method you use, it’s always advisable to tackle one room at a time rather than attempting to declutter your whole house in one go. Give yourself enough time to ensure you don’t become overwhelmed with the magnitude of the job.

If you’re moving soon and want to get it all done quickly, consider looking for local cleaners in London to help with the decluttering process.

Seek help from a friend or professional organiser

More often than not, hoarding is caused by our psychological attachment to objects. Sometimes what you really need is an objective person to help you with the task of discerning trash from treasure. Consider hiring someone who can organise your belongings to make decluttering much easier.

organising closet

Your helper can undertake different tasks, like organising your DVD and CD libraries, rearranging your cupboards or reorganising your closet. You could also ask them to make trips to dispose of junk or drop off old clothes at your local charity shop.

Clean as you declutter

Sometimes, decluttering and reorganising your belongings can leave your home in disarray. Instead of worrying about the mess, why not have someone do the cleaning for you?

cleaning house for moving

Moving house is chaotic as it is, and a professional cleaner can give you one less thing to think about.

Once your home is tidy and organised after the decluttering session, you’ll find packing up for your move so much easier!


Looking for someone to help with decluttering before your move? Find a helpful Airtasker in your local area!

How to paint window frames and door frames

Painting doors and window frames can be tricky if you're not a professional painter. Read on for some expert tips.

How to paint window frames and door frames

Painting window doors and frames is seen by many to be the toughest part of the painting process. So if you’re struggling with this, don’t worry – everyone else is too! Patience and a steady hand definitely help, but there are tips and tricks that you can can use to make window and door painting a lot easier and quicker.

Here’s our guide on how to paint window frames and door frames like a professional painter decorator.

Proper painting preparation

First things first, kick off by putting the proper prep work in. Cleaning and preparing your windows is an absolute must if you want to achieve a flawless finish. To start, remove all curtains and fixtures to make the painting process easier and save yourself a lengthy clean up post-paint.

To clean any spiderwebs and dust, use your favourite cleaning solution. This will help you achieve a sparking clean surface to paint on.

Remember to clean the top of the window sill, an area where a lot of dust tends to accumulate.

Finally, it’s time to lay down drop sheets (old bed sheets will do!) under the frame so you don’t spill any paint on the floor.

Masking tape

Masking tape is essential for painting windows and door frames where you’re using two different colours. To achieve truly smooth lines for windows, put masking tape on both the wall and also the glass before starting.

To get straight edges when you line the tape up, push the edges down where the paint will meet the tape. For corners, use a knife to tear the tape for a perfect seal.

 When removing the masking tape afterwards, rip off slowly at an angle before the paint completely dries up. Otherwise you may accidentally rip off some paint too.

If there are any larger parts you need to paint around which can’t be removed, use paper towels to cover and tape to hold it in place.

Filling in and patching

Every paint job can get worn and torn over time. For any scratches, apply a bit of filler with a putty knife to fill in the hole. Use a damp cloth to remove any excess and help to give it a smooth surface – and less sanding!

Brushes and painting

Now for the fun part – it’s time to get stuck into the actual painting. Grab an angled paintbrush and dip it halfway into the paint (you don’t need a lot of on your brush) and then tap it on the bucket.

Paintbrushes and paint

When you begin painting, start with the area closest to the glass first and work your way out. This helps to prevent any accidental smudging as you paint. After you’ve finished the inside, paint the frame that faces the room.

Depending on the type of paint and the old colour, you may need multiple coats for a smooth finish.

Cleaning up

Time for the not so fun part. Remove the masking tape slowly before the paint has completely dried. If it’s already dry, have a knife handy to help cut away the tape without peeling off any of your beautiful paintwork.

Pack up your drop sheets, clean your brushes, and store any unused paint and brushes for future touch-ups or your next painting task!

Do you have any tips for window and door frame painting? Let us know in the comment section below. 

Looking for assistance with painting projects or general home repair? Connect to a number of people offering expert painting decorator services in London today.

How to clean your oven with baking soda

Baking soda can be particularly effective for oven cleaning. See why and how here!

How to clean your oven with baking soda

You may have heard people raving about using baking soda as a cleaning product. Once you’ve tried using it in your home, you’ll see what they mean! Baking soda can be particularly effective for oven cleaning.

It’s inevitable that food will splatter down the inside of our ovens. Our pasta bakes bubble over, oil spills from a roast, and sauces drip onto the racks. At some point, we’re all faced with a black, sticky mess in our oven. That, let’s be honest, we try and ignore for as long as possible!

Looking to hire a cleaner in London? Find rated and trusted cleaning professionals on Airtasker.

But eventually, the time will come when we need to clean it. This means you’ll need an oven cleaning service to remove the baked-on grime. Or you could simply turn to two simple supermarket ingredients – baking soda and vinegar.

One of the best things about using a baking soda and vinegar solution is it means not exposing your skin to another cleaning product laden with chemicals. What’s more, it’s cheap and you probably already have it in your kitchen!

Baking soda

Baking soda and bicarbonate of soda (“bicarb soda”) are leavening agents, meaning they create bubbles that expand while baking, causing batters to rise. Bicarb soda is the purer form of the leavening agent and requires an acid plus moisture to cause the bubbles. Baking soda is simply bicarb soda which has already been premixed with an acid (often cream of tartar).

It’s this bubble-making action that is so effective in lifting food debris from your oven. When you use baking soda or bicarb soda together with highly acidic vinegar, the resulting mixture breaks down food particles like nobody’s business.

Because it’s a natural product, you may be assuming it can’t be effective on a crusted-up oven. But it actually does a brilliant job at oven cleaning. Best of all, there are no harsh fumes emanating from your oven next time you bake, and no harmful chemicals lingering in the place where you cook your food. Sure, you may want to wear rubber gloves if old food grime is a bit icky, but at least you won’t be risking burns if you don’t.

So what’s the best way to use baking soda for an oven cleaning service?

  • Begin by removing your oven racks. These likely need a good clean too, so place them to soak in your sink with hot water and a splash of vinegar.
  • Meanwhile, mix equal parts water, baking soda, and vinegar in a bowl to create a spreadable paste.
  • Spread this paste on the inside of the oven, coating all interior surfaces but avoiding the heating elements.
  • Add a thick layer (about a quarter of an inch) to the bottom of the oven. Leave overnight or for at least 12 hours.
  • The next day, use a wet cloth to wipe off as much of the paste as possible.
  • Pour vinegar into a spray bottle, spritz all surfaces, and wipe down with a clean cloth.

To clean the oven window:

  • Make another paste, apply directly to the window and let sit for half an hour.
  • Use a clean cloth to wipe the window clean.
  • If there are stains inside the double oven window, you may also need to carefully unscrew these so you can clean the inside of the glass.

To finish up…

  • Thoroughly wipe off all the residue and rinse everything with clean water and a clean sponge.
  • Add some vinegar to your sponge to get your oven extra shiny.
  • Wash off the racks–this will be a breeze after their soaking–and return them to the oven.


For really stubbornly baked-on grease and food, you might need to repeat your oven cleaning service to get perfect results. Just make sure all the baking soda residue is removed completely before you use the oven again to cook, as any baking soda that remains on the heating elements can cause smoke.

And there you have it- a sparkling clean oven!

Short on time or elbow grease? Find an Airtasker who can help with cleaning in London


10 spring cleaning hacks for your home

Here's a pick of the best spring cleaning hacks to get you started.

10 spring cleaning hacks for your home

The days are getting longer and a little warmer, which means spring is here and summer is finally close! However, that also means it’s time to declutter and give your house a good spring clean. Although the extra work can make it seem like a massive weekend-long chore, we’ve collected a few simple hacks that will see you finished with your spring cleaning in no time.

From organising your house to polishing glasses, the list of to-do’s can be endless. Here’s a pick of the best spring cleaning hacks to get you started:

Organise your wardrobe

Clothes hanging up

Deciding what clothes to throw away is a tough choice and one we really don’t like to make. Why? Because we often attach nostalgic memories to our clothes. Sometimes though, it’s simply time to get rid of them. Especially if they haven’t been worn even once in the last year.

To make it easier to gauge what you really do and don’t wear, try hanging all of your coat hangers in the opposite direction to how you put them away. In a few weeks, you’ll be able to see which coat hangers are still in the original direction. These are clearly not items you reach for and could consider donating charity.

Messy drawers no more

We’ve all been guilty of shoving clean our laundry into a drawer without folding it, which makes it’s impossible to find anything. It’s not an effective use of space and also causes some serious creasing.

An easy solution is to pack your t-shirts vertically instead of horizontally. You’ll be able to fit more and also find your favourite tees in a few seconds – without making a mess!

Laundry organisation
Source: Imgur

Clean your vases

Getting rid of stubborn grime in your vases can be tough and unpleasant. To make it a little easier, add a cup of uncooked rice, warm water and half a cup of window cleaner and mix around. Your vase will be sparkling clean and ready for fresh flowers in an instant.

Window shutter dusting

Clean your shutters

As pretty as they look, window shutters aren’t the easiest blinds to clean. Luckily, there’s quick cleaning hack to help. All you need is a knife (not a sharp one) and a microfiber cloth to wrap around it. You can use this to clean each slat with ease and pick up dust easily.

Dusting lamp shades

Lampshade cleaning

Do you find that the dust just sticks to lampshades and doesn’t want to budge?  Try using a run-of-the-mill clothing lint roller to roll over the outside and inside of your lamp shades.

Shower curtain mould

To get rid of any mouldy build-up on your shower curtain, you could simply toss it into the washing machine. You could also make a natural cleaning solution, which can be reused every few weeks.

Make your own natural shower curtain cleaner by mixing half vinegar and half water into an empty spray bottle. Stretch the curtain to it’s full width (so you can get in the creases) and spray the vinegar solution. Leave for a couple of minutes, then wipe clean with a damp cloth.

Bathroom grout cleaning

Bathroom cleaning

Scrubbing grout can be labour intensive. And even with all your efforts, you may not be able to remove the most stubborn mould. To make it a bit easier on yourself, soak cotton wool in bleach and place along the mouldy grout. This will get rid (or at least make it easier to scrub) the mould off, saving time and effort.

Clearing out the drain

Drains can easily get clogged up with food particles. You can buy drain cleaners to help solve this, but for a chemical-free alternative try using baking soda and vinegar. You will need 2 cups of baking soda, 4 cups of boiling water and 1 cup of vinegar at your disposal.

Cleaning with baking powder

Follow these steps:

  • Pour 4 tbsp of baking soda carefully down the drain followed by 400ml of the boiling water. Wait a few moments.
  • Pour another 4 tbsp of baking soda, then the cup of vinegar. Plug the drain immediately as bubbles will rise.
  • When the bubbles die down slightly, pour in the remaining 400ml cups of boiling water.

Dusting high ceilings

Get to those hard to reach places, like ceiling corners, by using a broom with a microfibre cloth at the end. This will help you easily clear any dust or cobwebs.

If you’re having trouble with the cloth staying put, use a big elastic band or some string to keep it in place.


Or perhaps the best hack yet? Use the London cleaning services of an Airtasker and you can get your spring cleaning done without lifting a finger.

Indoor gardening ideas

Here are some beautiful indoor gardening ideas to try at home, in the office, or even in the little cafe you've been dreaming of opening.

Indoor gardening ideas

Indoor gardening is a great way to add style and a sense of tranquillity to your home. Having plants indoors not only brings a room to life; it helps with air quality and also contributes to improving mental health.

Here are some beautiful indoor gardening ideas to try at home, in the office, or even in the little cafe you’ve been dreaming of opening.

vertical indoor gardening
Source: woo home

Terrariums

Terrariums are gorgeous placed on a table or hanging from the ceiling (and they make great gifts)!  The word ‘terrarium’ is used to describe a miniature garden in a container, often made of glass and usually sealed, but can also refer to open-air containers.  They can be soil based, soil-free, sand-based or water-based.

water terrarium indoor gardening
Source: Etsy

You can purchase pre-established terrariums from garden centers, gift shops and online, or you can enjoy making your own. Get creative and try using random glass objects, such as a light bulb, water jug, or fish bowl, and fill them with succulents, indoor ferns, air plants, moss and florals.

indoor gardening terrariums
Source: Uncovet Blog

Vertical gardening

Bring your indoor area to life by installing a vertical garden. Vertical gardens are perfect for those homes with limited space. Often mounted or hanging, you can choose to utilise your vertical garden for purely aesthetic purposes or make it into your own little indoor herb or vegetable garden.

Living Walls

Living walls or green walls are the ‘next level’ in vertical gardening. You can create a fixed or moveable feature wall with tumbling greenery or brightly coloured flowering plants. Make it extra special by installing some downlights or water-proof fairy lights that you can switch on in the evening.

Depending on your design, to set up a living green wall, you might need a:

  • Free-standing or mountable structure
  • A layer of water-proofing (plastic) to protect the wall behind
  • A layer of fabric for your plants to grow on, and
  • A drip irrigation system with appropriate drainage.

Once you’ve got the structure sorted out, you can then select and install your plants.

Airtasker has some very talented gardening professionals available to help set your green wall up for you.

living green wall indoor gardening
Source: studio m interior design

Suspended indoor gardening ideas

Suspended indoor gardens and upside-down gardens are stunning indoor gardening ideas that will make any space feel extravagant.  Imagine the serenity of having a rainforest canopy above your floating kitchen bench, or in the middle of your family room.

suspended indoor gardening
Source: Happy Interior Blog

Upcycled planters

Mason jars, glass jugs, light bulbs, old lanterns and vintage trunks are all perfect items to recycle and revitalise by using as a planter for your indoor garden. Hunt down inspiration on Pinterest and head to your local charity shop to find a bargain item in need of some upcycling love.

indoor gardening tulips planter
Source: Pinterest

Succulents

Succulents do exceptionally well in most indoor gardening situations. They come in a wonderful variety of shapes, sizes, and colours and are generally readily available at gardening centers and nurseries.

succulents indoor gardening
Source: Stagetecture

Air plants

Tillandsia (a.k.a air plants) are the brown-thumb’s best friend; they need hardly any attention because they thrive on oxygen (over-watering will actually kill them). Place them in terrariums or on unique air plant holders.


air plant indoor gardening
Source: Idle Hands Awake

Love our indoor gardening ideas, or have a few ideas of your own you’d love to share with us?  Let us know in the comments below!

Looking for some help with your garden? Find trusted and local gardeners using Airtasker.